5 Easy Decoupage Projects to Try This Holiday Season
As the festive season gets closer, I start looking for ways to make my home cozy and festive. Decoupage, the art of decorating with paper cutouts, is perfect for this. It lets me make unique, personalized holiday decor and gifts that really capture the holiday spirit.
Decoupage is great for making festive ornaments and adding holiday themes to plain surfaces. It’s my favorite way to decorate my home without spending a lot. In this article, I’ll show you five easy decoupage ideas to make your home merry and bright this holiday season.
Key Takeaways
- Decoupage is a versatile craft technique for decorating objects with paper cutouts.
- Decoupage projects are perfect for creating unique holiday ornaments, gifts, and home decorations.
- The options for decoupage crafts are endless, making it an easy and creative craft for all skill levels.
- Decoupage projects can transform everyday items into festive decor pieces using simple materials and techniques.
- Decoupage is a cost-effective way to add a personalized touch to your holiday decor and gifts.
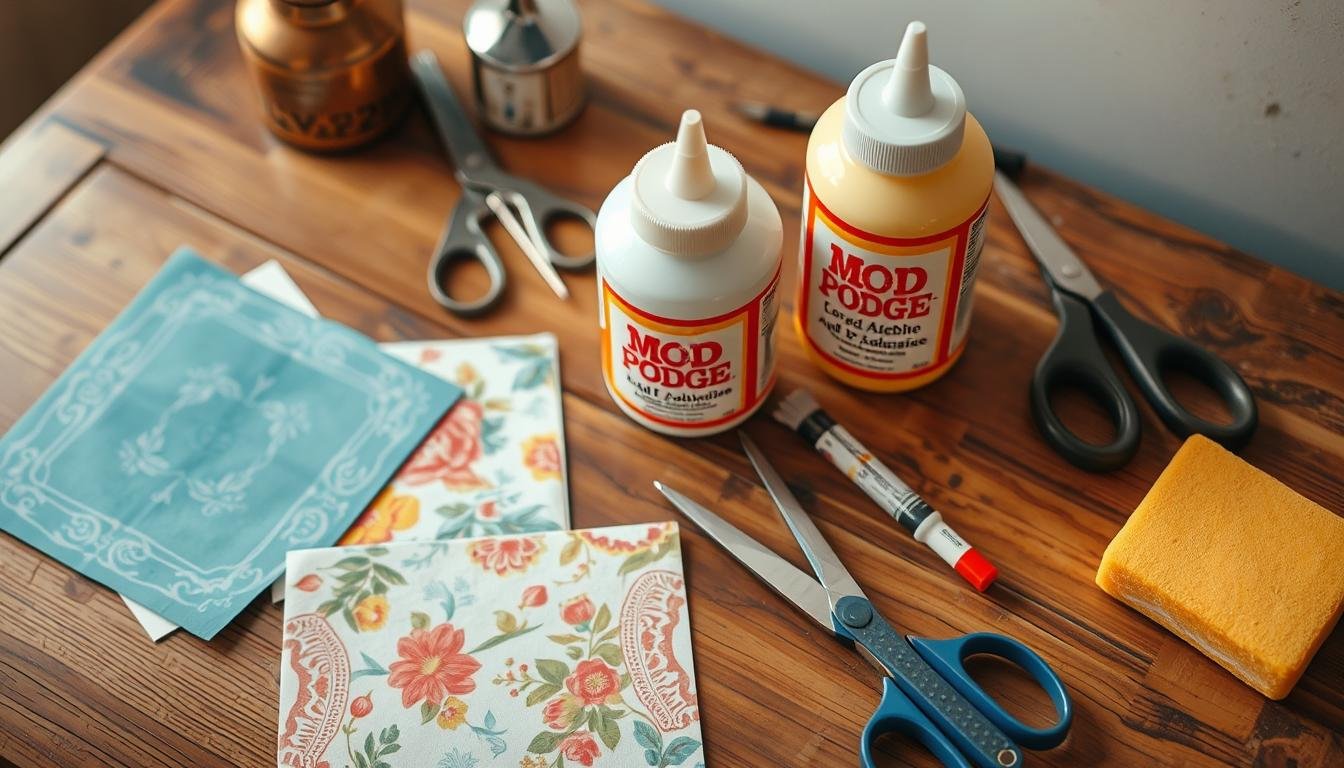
Getting Started with Holiday Decoupage: Essential Materials and Tools
Starting your holiday decoupage project? You’ll need some key materials and tools. First, get the versatile Mod Podge. It comes in finishes like gloss and matte. You’ll also need paintbrushes, scissors, and various papers like holiday-themed napkins, tissue paper, or printable designs.
Seasonal items like Christmas napkins or custom designs can make your projects merry and bright.
Basic Supplies Checklist
- Mod Podge (gloss or matte finish)
- Paintbrushes (various sizes)
- Scissors
- Holiday-themed paper materials (napkins, tissue paper, printable designs)
- Bases for decoupage (clear ornaments, Dollar Tree finds, thrift store items)
- Spray paint (for base coats)
- Embellishments (ribbons, twine, etc.)
Types of Mod Podge Finishes
Mod Podge comes in different finishes for your projects. The gloss finish is shiny, while the matte finish is subtle. Pick the one that fits your style and materials.
Choosing the Right Paper Materials
For paper crafting techniques in decoupage, you have many choices. Use high-quality, patterned napkins, tissue paper, or designs that feel festive. Try different textures and thicknesses for your desired look.
Understanding Decoupage Techniques for Beginners
Decoupage is a fun paper crafting method that turns simple surfaces into beautiful art. You can use napkins, cut out designs, and apply them with Mod Podge. This makes wood, glass, and terracotta look amazing.
To start, you need to get your surface ready. This might mean cleaning, sanding, or priming it. Then, apply a thick layer of Mod Podge to your base.
- Place your paper designs carefully, smoothing out any wrinkles or bubbles.
- Put more Mod Podge on top to seal and protect your work.
- Let each layer dry completely for a professional finish.
Decoupage is all about trying new things. You can use different papers like napkins or magazine cutouts. Layering and overlapping these can create amazing effects that show off your style.
| Decoupage Supplies | How-to Steps |
|---|---|
|
|
Learning decoupage opens up a world of creativity. It’s great for both newbies and seasoned crafters. So, get your supplies ready, let your imagination run wild, and start your decoupage adventure!
“Decoupage is a captivating paper crafting technique that allows you to transform ordinary surfaces into stunning works of art.”
5 Easy Decoupage Projects to Try This Holiday Season
As the holiday season comes near, why not make your home decor special with easy decoupage projects? You can turn everyday items into unique treasures. Let’s look at five fun decoupage ideas to fill your home with holiday cheer.
Napkin Decoupage Christmas Ornaments
Creating custom Christmas ornaments from napkins is a delightful project. Pick holiday napkins, then use the single layers for designs. Spray paint ornaments white or metallic, and apply napkin pieces with Mod Podge Gloss Finish. Use jute twine or velvet ribbon for a nice finish.
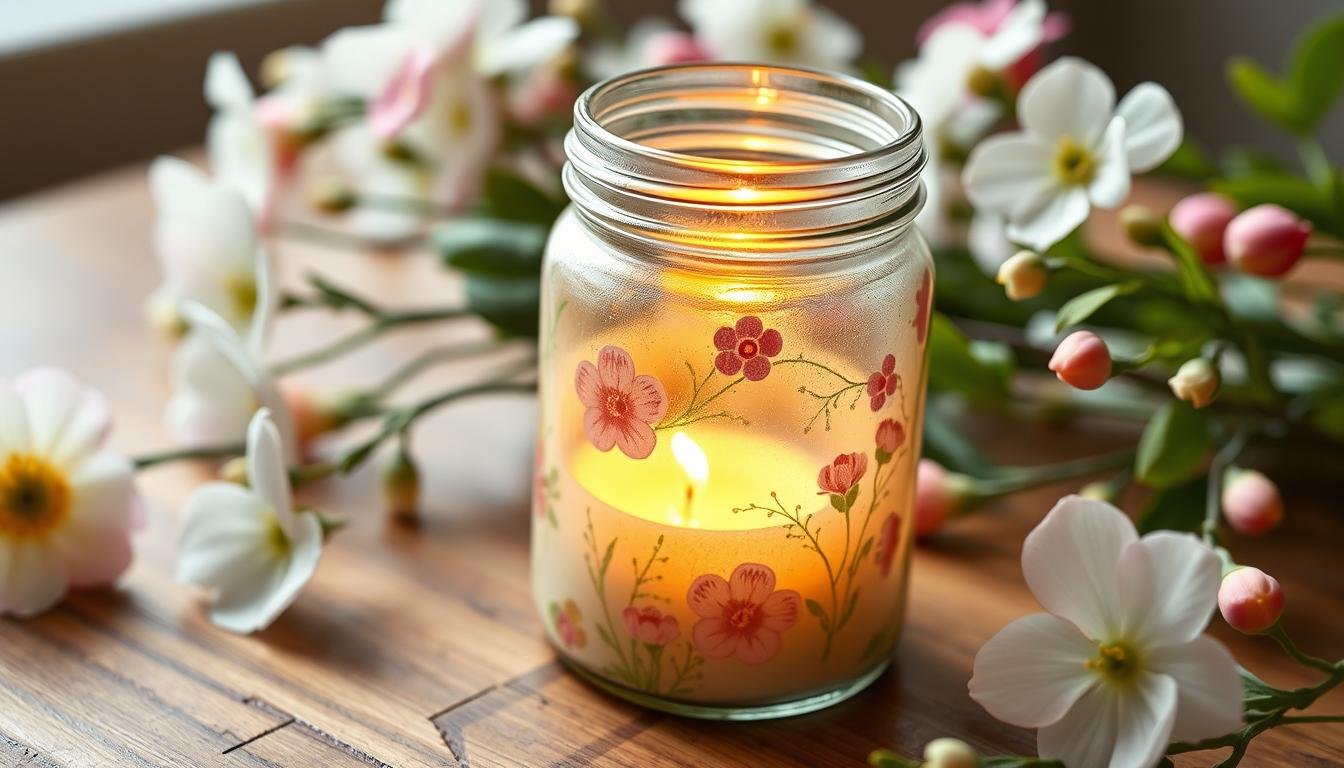
Holiday-Themed Mason Jar Luminaries
Make simple mason jars into magical holiday lights with napkin decoupage. Choose napkins with snowflakes or Christmas trees, and stick them on the jars with Mod Podge. Paint the jars first for a cool look. Then, add a tealight candle for a warm glow.
Festive Wooden Tray Makeover
Give your holiday serving pieces a special touch with a wooden tray makeover. Paint the tray white or a festive color, then add napkin segments or holiday decoupage paper. Seal it with Mod Podge for a lasting finish. It’s great for a unique serving tray or rustic centerpiece.
Creating Decoupage Christmas Ornaments: Step-by-Step Guide
Make your holiday season more special with DIY decoupage Christmas ornaments. This guide will show you how to turn plain ornaments into beautiful, festive pieces. You’ll use napkin decoupage and DIY Christmas ornaments to do it.
You’ll need some basic supplies to start. These include clear or painted ornaments, Mod Podge, foam brushes, scissors, and holiday-themed napkins or prints. This project is easy for anyone to do, so let your creativity flow!
- Start by picking the designs you like from your napkin.
- Put a thick layer of Mod Podge on your ornament with a foam brush.
- Place your napkin pieces on the ornament, smoothing out wrinkles and bubbles.
- Press down gently with your fingers to seal the design.
- Put another layer of Mod Podge on top to seal and protect the design.
- Paint your ornaments white before adding the napkin decoupage for a brighter look.
- Let the ornaments dry completely before adding ribbons or hangers.
This project is very flexible. Try different napkin designs, colors, and ornament shapes. You’ll get a unique set of DIY Christmas ornaments that will make your holiday decor special. Share your creations on social media with #NapkinDecoupage and #DIYChristmasOrnaments. It’s a great way to inspire others to make their own ornaments!
Decoupage crafts are a hit during the holidays. They let anyone make unique and personalized DIY Christmas ornaments easily. Napkin decoupage is simple, using Mod Podge to paste images. With some creativity and the right materials, you can turn simple ornaments into stunning pieces. They’ll add joy to your home and make great gifts for loved ones.
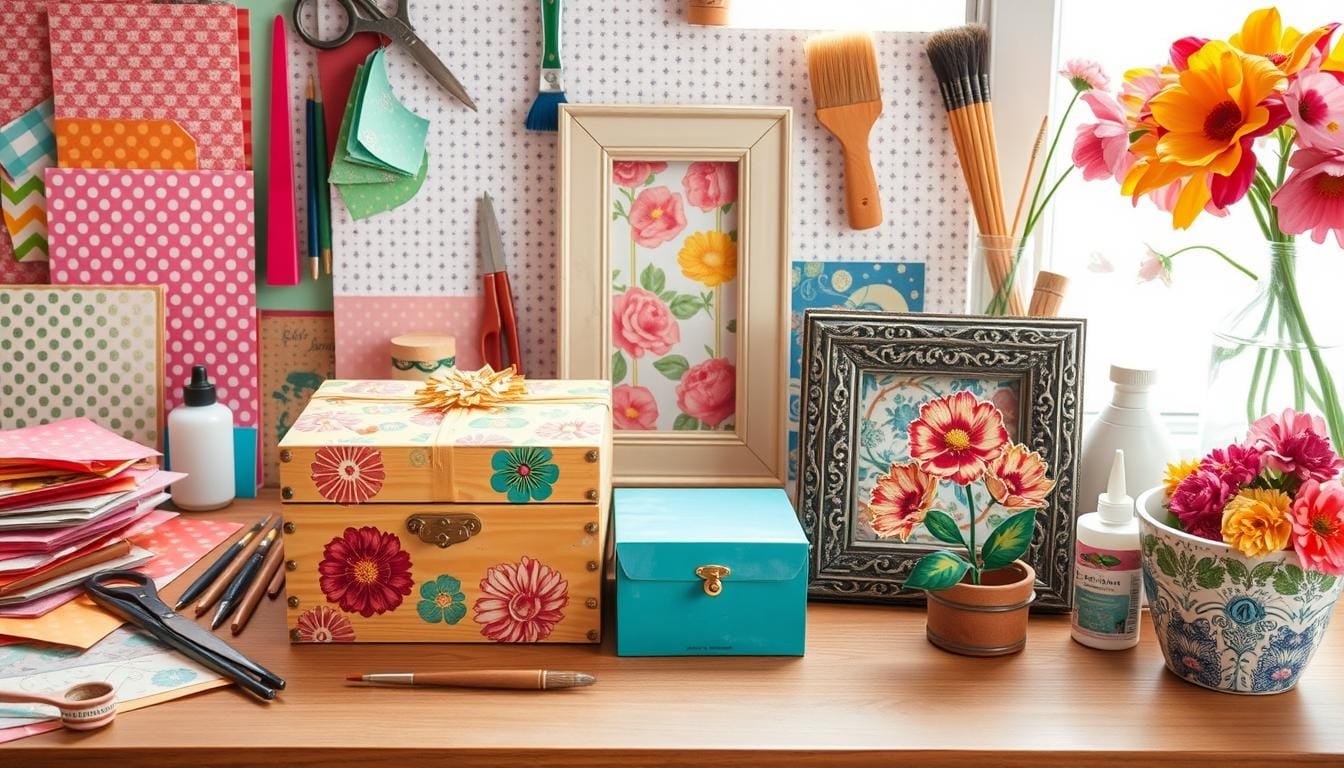
Transforming Dollar Store Items with Holiday Decoupage
As a budget-conscious crafter, I’ve found amazing potential in dollar store items. These affordable finds can be turned into beautiful, custom holiday decor. They look just as good as expensive home goods.
Budget-Friendly Material Selection
At the dollar store, I look for plain, unfinished items perfect for decoupage. My top picks include:
- Unfinished wooden ornaments, trays, or picture frames
- Plain glass vases or jars
- Undecorated ceramic or resin trinket dishes
These items are a blank canvas for my holiday decoupage projects.
Preparation and Painting Tips
Before starting, I clean the surface and sand it lightly if needed. This ensures the Mod Podge sticks well. For a matte look, I use chalk paint. For shine, I choose shimmery acrylic paint.
Finishing Touches and Embellishments
Now, the fun begins! I add personal touches to my projects. My favorite embellishments are:
- Glitter, sequins, or rhinestones for sparkle
- Ribbons, bows, or tassels for festive flair
- Dimensional stickers or 3D elements for depth
By mixing different techniques and materials, I create unique, high-end-looking items. These are perfect for my budget-friendly holiday decor.
“Decoupage is the perfect way to transform inexpensive items into personalized, eye-catching holiday decorations. The key is to get creative with budget-friendly materials and add your own unique flair.”
Holiday Gift Ideas Using Decoupage Techniques
This holiday season, why not get creative with decoupage and craft some unique gifts? Decoupage turns everyday items into special treasures. Let’s look at some gift ideas using decoupage that will wow your loved ones.
Customized photo ornaments are a hit DIY holiday gift. Use your favorite family photos and festive napkins or scrapbooking paper. Decoupaging these ornaments is fun and creates a keepsake that will be treasured for years.
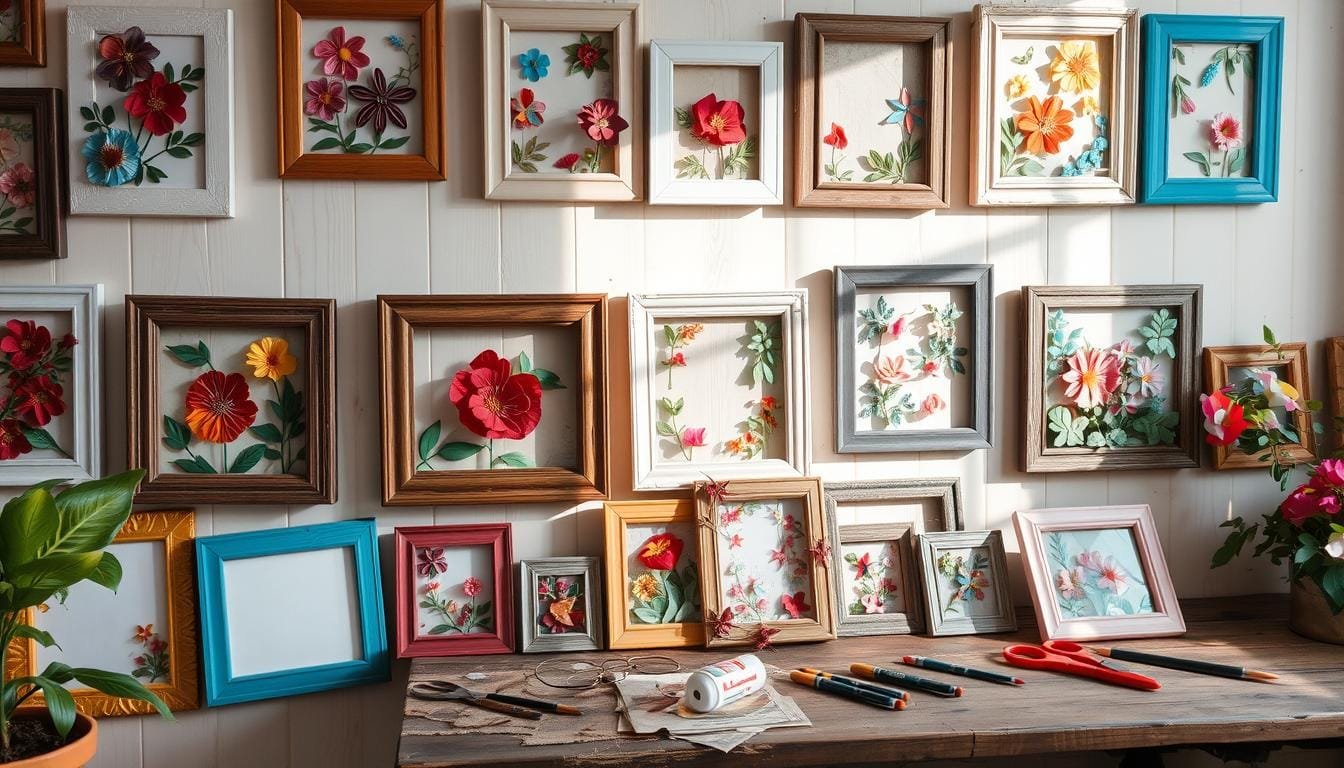
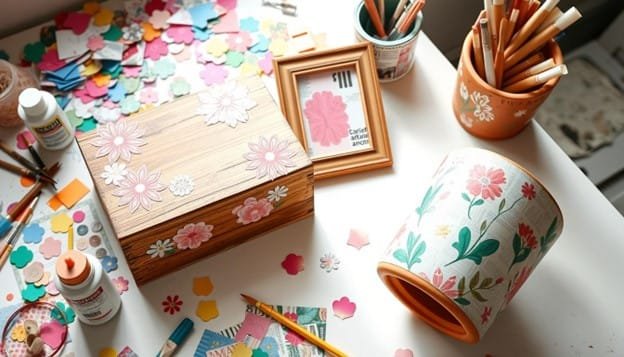
Consider a decoupaged jewelry box as a gift. Turn a simple box into a stunning piece with decorative papers, photos, or quotes. This personalized jewelry box is a great gift for the special women in your life.
For the entertainer, make a decoupaged serving tray or coasters. Add holiday patterns, family photos, or designs that match their style. These unique items will enhance their home decor.
Lastly, decoupage can make beautiful candle holders. Use festive napkins, scrapbooking paper, or dried botanicals on plain containers. This creates a stunning and fragrant holiday gift.
The beauty of these gift ideas is their personal touch. Add meaningful elements like family photos or messages to make them special. So, grab your Mod Podge and start crafting. Your loved ones will love these DIY holiday gifts for years.
Troubleshooting Common Decoupage Challenges
Decoupage can be a fun DIY project, but sometimes you hit a snag. Don’t worry, with the right tips, you can fix these issues. This way, you can make beautiful decoupage projects that stand out.
Dealing with Wrinkles and Bubbles
Wrinkles and bubbles can be a big problem in decoupage. To avoid them, work slowly and smooth the paper with a soft cloth or brayer. If wrinkles won’t go away, try using a low-heat hair dryer to flatten them.
Fixing Application Mistakes
Mistakes happen in decoupage, but they’re easy to fix. If you mess up, just peel off the paper while it’s still wet and reapply it. Work fast to avoid damaging the surface.
Proper Drying Techniques
It’s important to let your decoupage dry properly for a great finish. Let each layer dry for 24-48 hours before adding more. Rushing the drying can cause problems like tackiness.
With these tips, you’ll be able to make beautiful decoupage without flaws. Remember, patience and attention to detail are key to overcoming any decoupage challenge.
Seasonal Decoupage Design Inspiration
Exploring decoupage, I find endless ways to make holiday decorations unique and beautiful. Whether you prefer classic Christmas designs or autumn’s cozy colors, there’s a decoupage for everyone.
For a festive look, I enjoy using red and green with snowflakes, holly, or vintage winter scenes. Decoupage lets me turn simple items into magical holiday pieces, like wooden trays or glass jars. Adding different patterns and textures, like floral napkins or gold foil, adds depth and interest.
In fall, I’m inspired by the warm colors and natural elements. Think of a decoupaged pumpkin or coasters with leaves and foliage. Decoupage opens up a world of possibilities for seasonal crafts. It lets me add a personal touch to my home, capturing the holiday spirit.
Source Links
- https://2beesinapod.com/11-easy-decoupage-projects-perfect-for-every-home/
- https://sustainmycrafthabit.com/how-to-make-holiday-mason-jars-with-decoupage/
- https://modpodgerocksblog.com/decoupage-ideas/
- https://blueskyathome.com/how-to-make-easy-diy-decoupage-christmas-ornaments/
- https://designertrapped.com/how-to-decoupage-napkins-to-customize-anything/
- https://modpodgerocksblog.com/essential-decoupage-supplies/
- https://www.dltk-kids.com/crafts/decoupage/
- https://welcometonanas.com/beginner-decoupage-ideas/
- https://jfcraftcorner.com/easy-decoupage-ideas-for-beginners-fun-crafts/
- https://www.thepondsfarmhouse.com/easy-napkin-decoupage-christmas-ornaments/
- https://clochesandlavender.com/easy-christmas-ornaments/
- https://ourcraftymom.com/decoupage-christmas-ornaments/
- https://sugarspiceandglitter.com/decoupage-christmas-ornaments/
- https://modpodgerocksblog.com/mod-podge-holiday-crafts/
- https://ourcraftymom.com/dollar-tree-crafts/
- https://www.thepondsfarmhouse.com/easy-napkin-decoupage-christmas-ornaments/?srsltid=AfmBOorBFDwDlvh9qyLNZF8aA5gMKt101lpJMVILhLh1wCABmQWzUYOy
- https://www.petscribbles.com/holiday-gift-box-diy-easy-decoupage/
- https://www.firstdayofhome.com/decoupage-cans/
- https://www.semiglossdesign.com/how-to-fix-decoupage-problems
- https://confessionsofaplateaddict.blogspot.com/2012/08/fun-fall-projectsdecoupage-pumpkins.html
- https://www.pillarboxblue.com/decoupage-ideas-for-adults/
- https://www.oursouthernhomesc.com/how-to-make-decoupage-chinoiserie-ornaments/


Jen is a healthcare pro by day and a DIY enthusiast by night, bringing creativity to life on JF Craft Corner! From decoupage to Cricut crafts, she’s all about making DIY magic (and a little mess). She also co-runs The Heart of Mindful Living blog and podcast, inspiring others to refresh their minds and nurture their souls. Her trusty sidekick? Fergus, her chocolate Shih Tzu and certified therapy dog, always on cuddle duty. Jen believes true leadership starts with kindness—and, of course, a little glitter!