Decoupage DIY: Create Festive Holiday Table Settings
As winter arrives, I feel a rush of excitement for the holidays. I love making my home festive with decoupage. It’s a craft that turns simple surfaces into beautiful holiday decorations.
This year, I want to share my love for decoupage DIY with you. Let’s make our holiday tables special together. We can use paper napkins, Mod Podge, and creativity to make our dining tables shine.
Key Takeaways
- Decoupage is a versatile craft technique for creating festive holiday table settings.
- It involves using paper napkins, Mod Podge, and various surfaces to craft unique decorations.
- Decoupage can be applied to candles, wood, and other table accessories to elevate your tablescape for all seasons and holidays.
- Decoupage DIY projects allow you to personalize your holiday table settings with a touch of handmade charm.
- Explore a variety of seasonal motifs and color palettes to suit your personal style and the occasion.
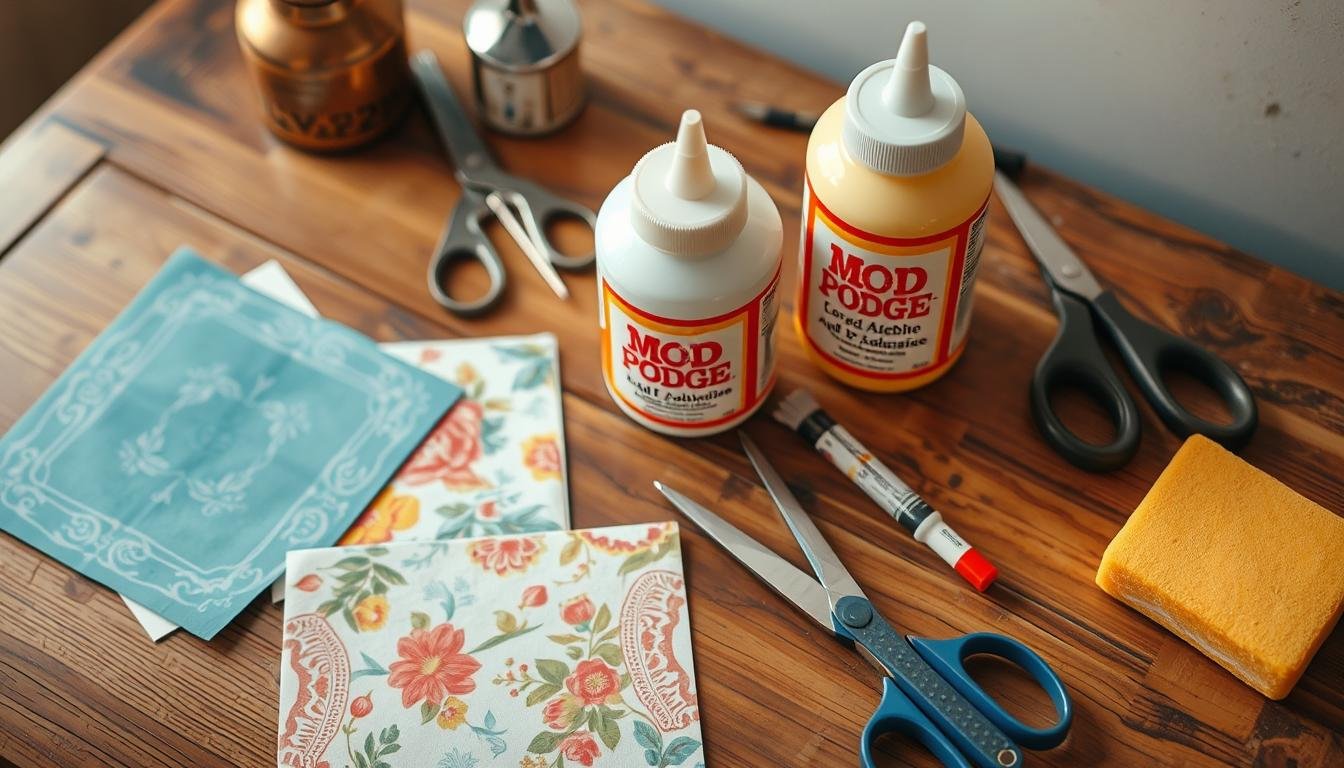
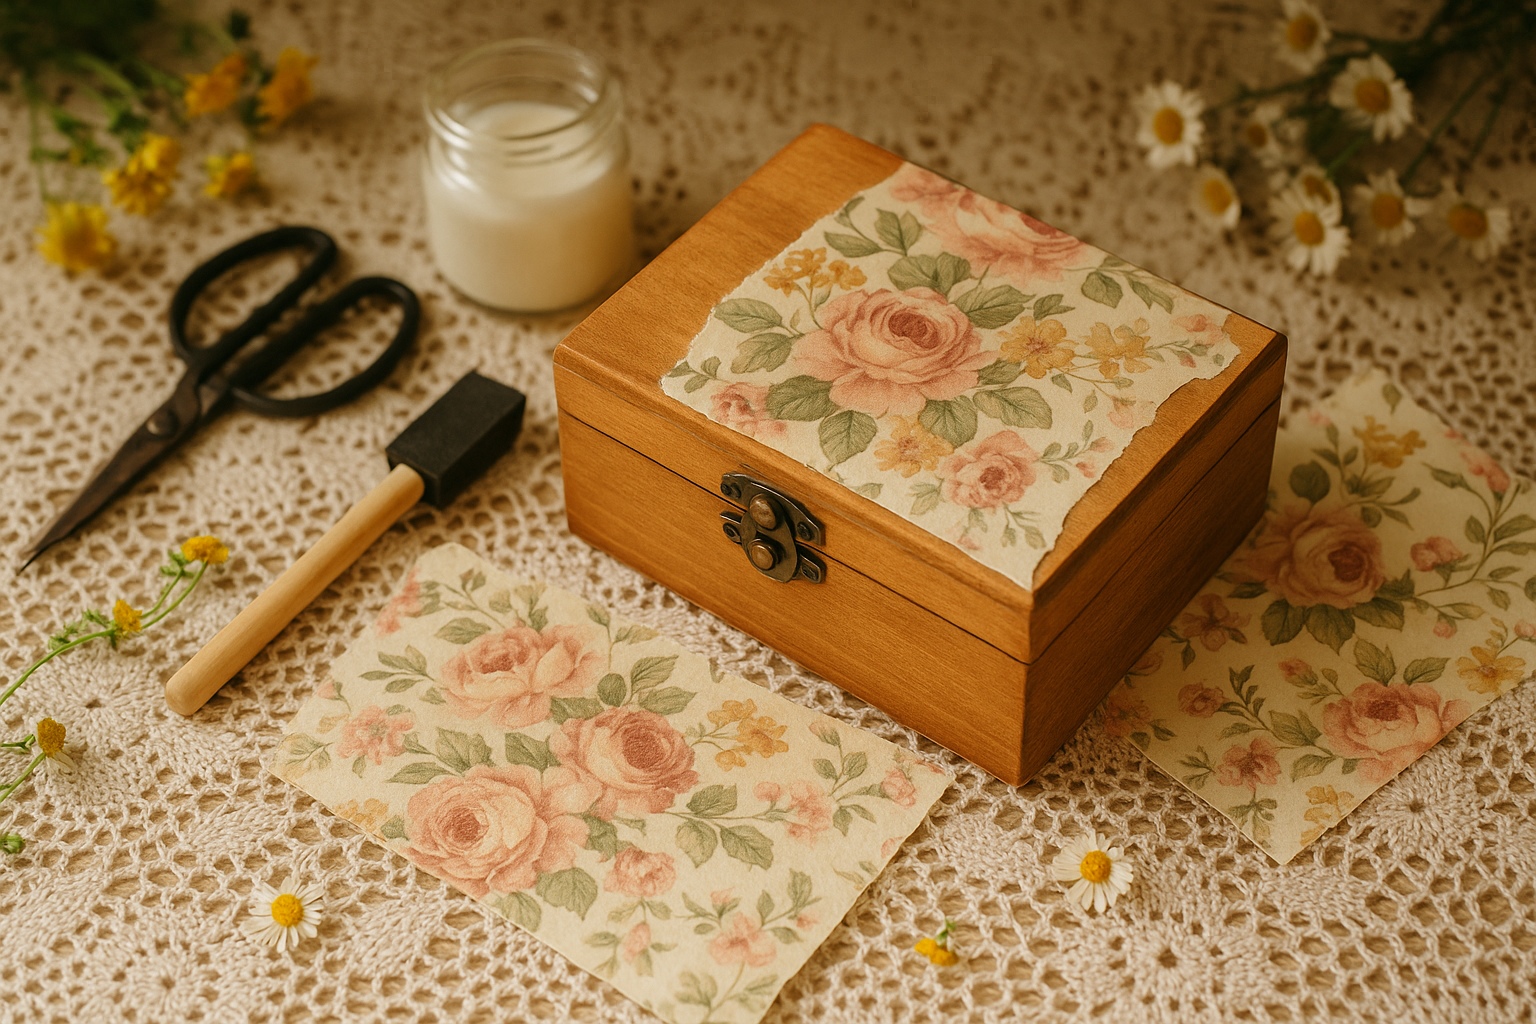
Essential Materials and Tools for Holiday Table Decoupage
Decoupage crafts are becoming more popular, especially for holiday decor. To start your festive table projects, you need the right stuff. We’ll cover the basic supplies and extra decorations, plus safety gear, for a smooth decoupage experience.
Basic Supplies for Getting Started
- Paper napkins in seasonal patterns and colors
- Mod Podge, a versatile decoupage medium
- Paintbrushes for applying the Mod Podge
- Smooth, clean surfaces like wood, glass, or candles to decoupage
Optional Decorative Elements
- Acrylic paint in complementary colors
- Glitter or other embellishments for added sparkle
- Ribbons, trims, or other decorative accents
Safety Equipment
For a safe decoupage experience, you’ll need:
- Protective gloves to prevent skin irritation
- A clean, well-ventilated workspace with a protective surface cover
With these materials and tools, you’re ready to make beautiful decoupage crafts. Preparation is key, so set up your space and get all your supplies before starting.
| Item | Description | Quantity Needed |
|---|---|---|
| White or cream pillar candles | Provide a blank canvas for decoupage | 2-3 candles |
| Cocktail napkins | Offer a variety of seasonal patterns and colors | 8-10 napkins |
| Parchment paper | Protects work surface during decoupage | 1 roll |
| Hair dryer | Speeds up drying process for decoupage layers | 1 hair dryer |
| Wood sign box | Provides a sturdy base for decoupage projects | 1 box |
| Craft sticks | Useful for smooth application and removal of excess Mod Podge | 1 pack |
| Chalk paint | Adds a matte, vintage-inspired finish to decoupage surfaces | 1 jar |
| Glue gun | Helpful for attaching decorative elements and trims | 1 glue gun |
| Corrugated cardboard | Provides a sturdy base for decoupage projects | 1 sheet |
With these materials and tools, you’re set to create beautiful decoupage crafts. Remember, preparation is key. Set up your space and gather all your supplies before starting.
Understanding Decoupage Techniques for Table Settings
Decoupage is a fun way to decorate surfaces by gluing cut-outs. It can turn your holiday table settings into stunning pieces. You can use it for napkin decoupage or other surfaces, following a few key steps.
Start by separating your napkin’s plies to show the patterns or designs. Then, apply a thick layer of Mod Podge to the surface. Place the napkin ply on top, smoothing out wrinkles or bubbles with a plastic wrap and rolling pin.
For wooden surfaces, mix Mod Podge with white chalk paint for a smooth finish. This is great for adding rustic charm to your table centerpieces or place card holders.
When decorating candles, wrap parchment paper around the napkin design. Use a hair dryer to melt the wax, sticking the pattern to the candle. This gives your candles a glossy, lasting finish.
Success in napkin decoupage and decoupage techniques comes from attention to detail and patience. With creativity, you can make your table settings festive and unique.
Preparing Your Holiday Table Surfaces
As the holidays get closer, making your table festive and inviting is key. The secret to a beautiful holiday table is in the surface prep. Whether it’s wood, glass, or something else, clean and prime well. This makes a perfect base for your diy table decorations.
Surface Cleaning Methods
Start by cleaning your table, candles, and display surfaces well. Remove stickers, labels, or old designs that are peeling. Sand wooden surfaces to make them smooth for decoupage.
Primer Application Tips
After cleaning, apply a primer or base coat. This is vital for the decoupage paper to stick well. Pick a primer that fits your surface, like wood, glass, or others. Spread it evenly for the best look.
Creating the Perfect Base
- For wooden surfaces, sand the area lightly to ensure a smooth finish before applying the primer.
- For glass surfaces like candles, make sure they are thoroughly cleaned and degreased before adding the decoupage paper.
- Consider applying a base coat of paint in a coordinating color to create a solid foundation for your decoupage design.
By properly prepping your surfaces, you’re ready for a stunning holiday table. Get ready to show off your diy table decorations and make a magical holiday atmosphere!
Decoupage DIY: Create Festive Holiday Table Settings
Make your holiday table pop with decoupage DIY projects! Turn simple table items into festive wonders. It’s a fun way to get into the holiday spirit. Let’s dive into the world of holiday decoupage and find lots of creative ideas.
Wood signs are great for decoupage. Just use colorful napkins and add clay pumpkins or vines for a unique look. You can also make cute houses from craft sticks to add a cozy feel to your table.
For a vintage vibe, paint and antique your decoupage pieces. This mix of old and new looks amazing. Add ribbons and bows to complete your look and make it perfect.
Getting into holiday decoupage lets you make special table settings. They’ll wow your guests and make your holiday even more special. With some creativity and the right stuff, you can turn simple items into amazing festive table decor.
Creative Napkin Decoupage Ideas for Centerpieces
Make your holiday table pop with napkin decoupage. It’s a fun way to make your table special. Pick the right patterns, colors, and layering to make your centerpiece stand out.
Selecting Seasonal Patterns
Choose napkins that match the holiday vibe. For Thanksgiving, go for autumn leaves or turkeys. Christmas napkins with holly or snowflakes are perfect. These patterns will set the mood and bring the holiday spirit to your table.
Color Coordination Tips
Make sure your napkin centerpiece matches your decor. Pick napkin colors that match your table’s colors, like candlesticks or placemats. This will make your table look great together.
Layering Techniques
Try layering different napkin designs for depth. Use torn edges or patterns to create a unique look. You can play with how you arrange your napkins to get a special effect.

With napkin decoupage, you can turn simple tables into amazing centerpieces. Your guests will love it, and your holiday will be even more special.
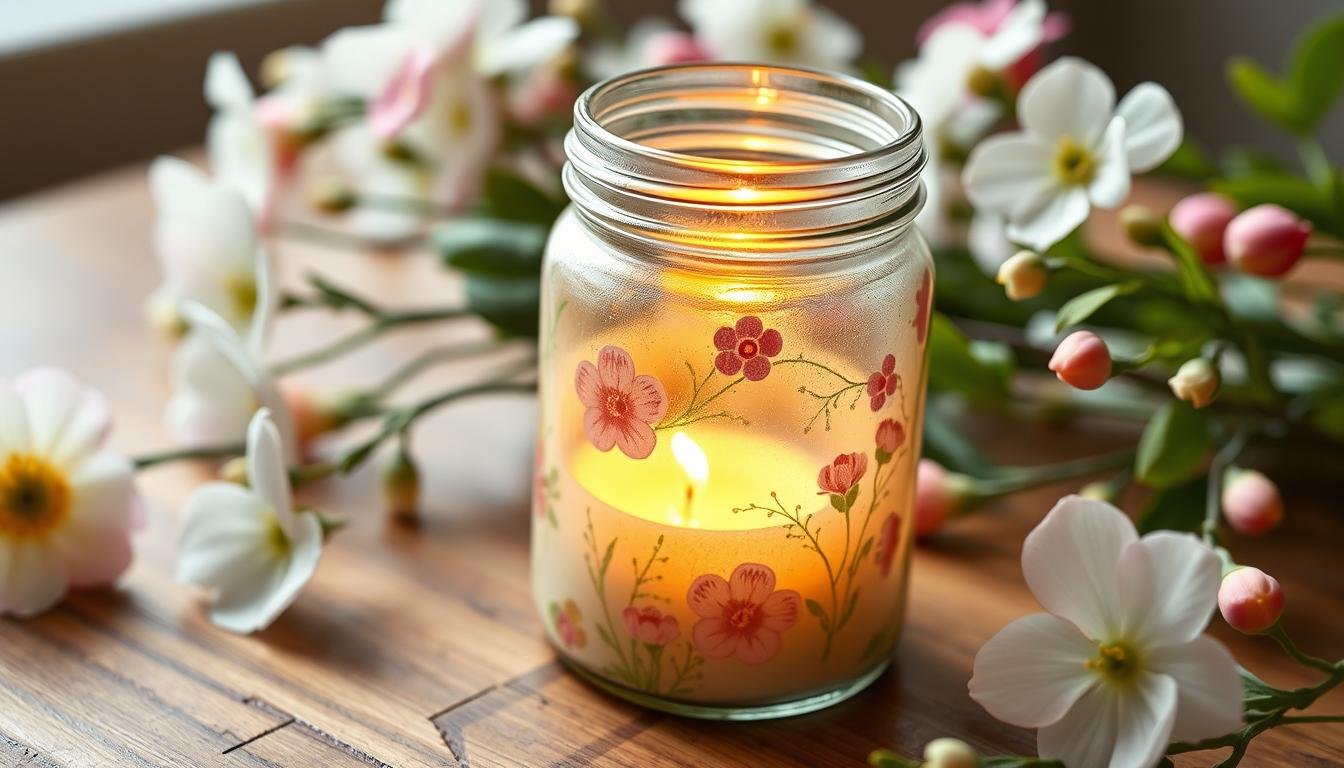
Transforming Candles with Decoupage Art
As the holiday season gets closer, making festive decor can be both fun and challenging. But, with decoupage, you can turn simple candles into beautiful centerpieces. This will make your holiday table look amazing. Let’s explore how to make decoupage candles and bring your ideas to life.
This project is easy because you only need a few things. You’ll need clean pillar candles, holiday-patterned decoupage napkins, a hair dryer, and parchment paper to protect your hands. Just melt the wax a bit with the hair dryer to stick the napkin to the candle.
To start, wrap the napkin around the candle and smooth out any air bubbles. Then, use the hair dryer to melt the wax a little, so the napkin sticks well. Be careful not to overheat the candle. After it sticks, cut off any extra napkin at the top and bottom. And that’s it! You’ve made a beautiful, unique decoupage candle for your holiday table.
This project is very flexible. You can try different napkin designs, from classic holiday patterns to modern styles. You can make your decoupage candles match your holiday candle decor perfectly.
These decoupage candles are great for any holiday gathering or to add festive charm to your home. With simple supplies and a little creativity, you can turn candles into stunning art. This will impress your guests and make your holiday even more special.
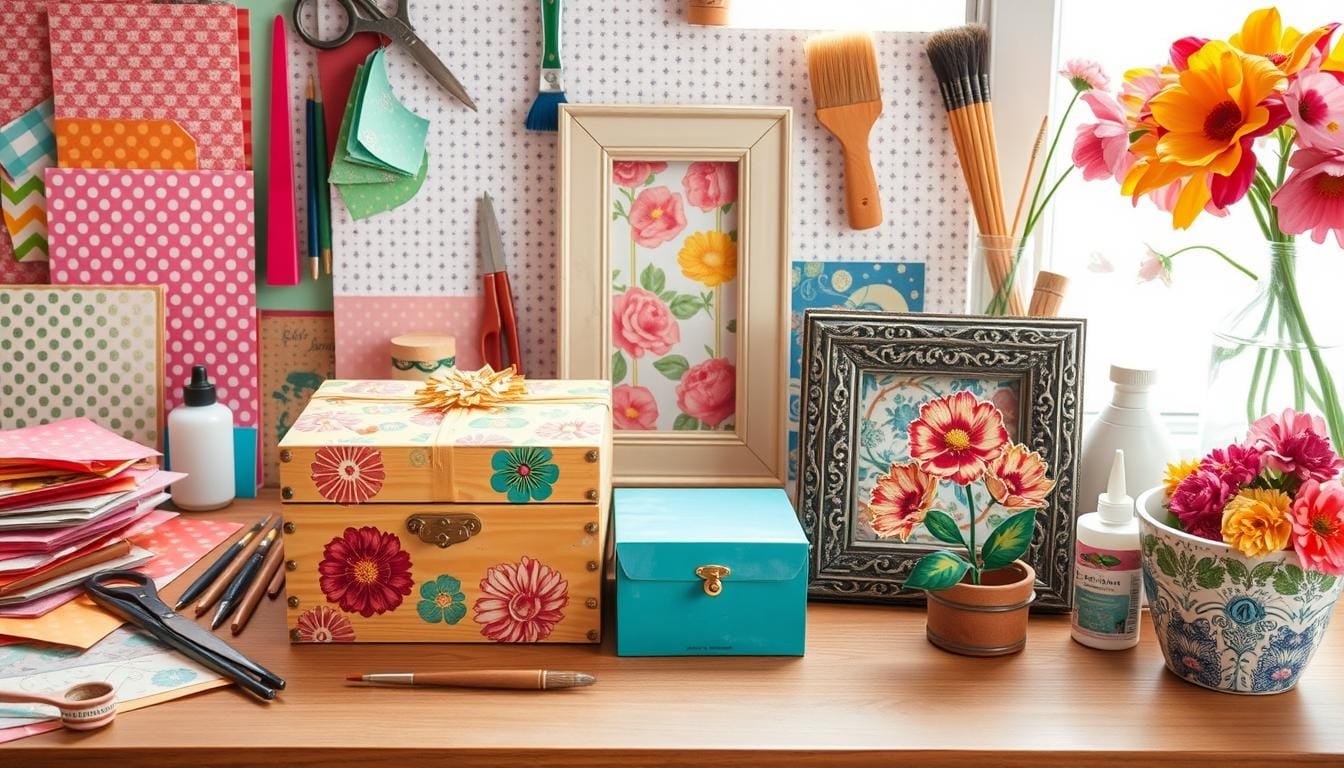
Custom Place Card Holders and Table Accessories
Make your holiday table stand out with custom place card holders and matching tableware. This DIY project is fun and lets you add your personal touch to the season.
Personalization Ideas
Turn small wooden shapes or air-dry clay into special place card holders. Add names and monograms with your cricut, or holiday designs with decoupage. To tie everything together, create matching napkin rings, coasters, and centerpiece pieces.
Matching Sets Creation
For a beautiful holiday table, keep things consistent. Choose a color scheme or theme for all your table accessories. For instance, make pumpkin-shaped place card holders and pair them with leaf napkin rings and a nature-themed centerpiece.
| Item | Yield | Cost | Activity Time | Dry Time |
|---|---|---|---|---|
| Place Card Holders | 6 | $3 | 1 hour 45 minutes | 1 hour |
With a bit of creativity and decoupage, you can turn simple items into unique table decor. It will wow your guests and make your holiday celebrations even more special.

Preserving and Protecting Your Decoupage Projects
As a DIY enthusiast, you’ve put a lot of time and effort into your decoupage projects. You don’t want them to get damaged or worn out. It’s important to seal and protect them well.
To keep your decoupage projects looking great, use multiple layers of Mod Podge or clear varnish. For wood items, a strong wood varnish like Polyvine adds extra protection. For a vintage look, try an antiquing medium over the sealed surfaces. And don’t forget to add some shine with rub-on metallic pastes!
Make sure all parts of your decoupage project are dry before using or showing them. This prevents smudging, peeling, or cracking. With a bit of care, your decoupage can be a beautiful part of your home for years.
| Preservation Technique | Benefits |
|---|---|
| Multiple Layers of Mod Podge | Seals and protects decoupage surfaces |
| Polyvine Wood Varnish | Provides extra durability for wood items |
| Antiquing Medium | Adds a vintage-inspired look to sealed surfaces |
| Rub-on Metallic Pastes | Enhances decoupage projects with a touch of shimmer |
Remember, decoupage preservation and protecting DIY decor are crucial. With care, your decoupage can become treasured family heirlooms for a lifetime.
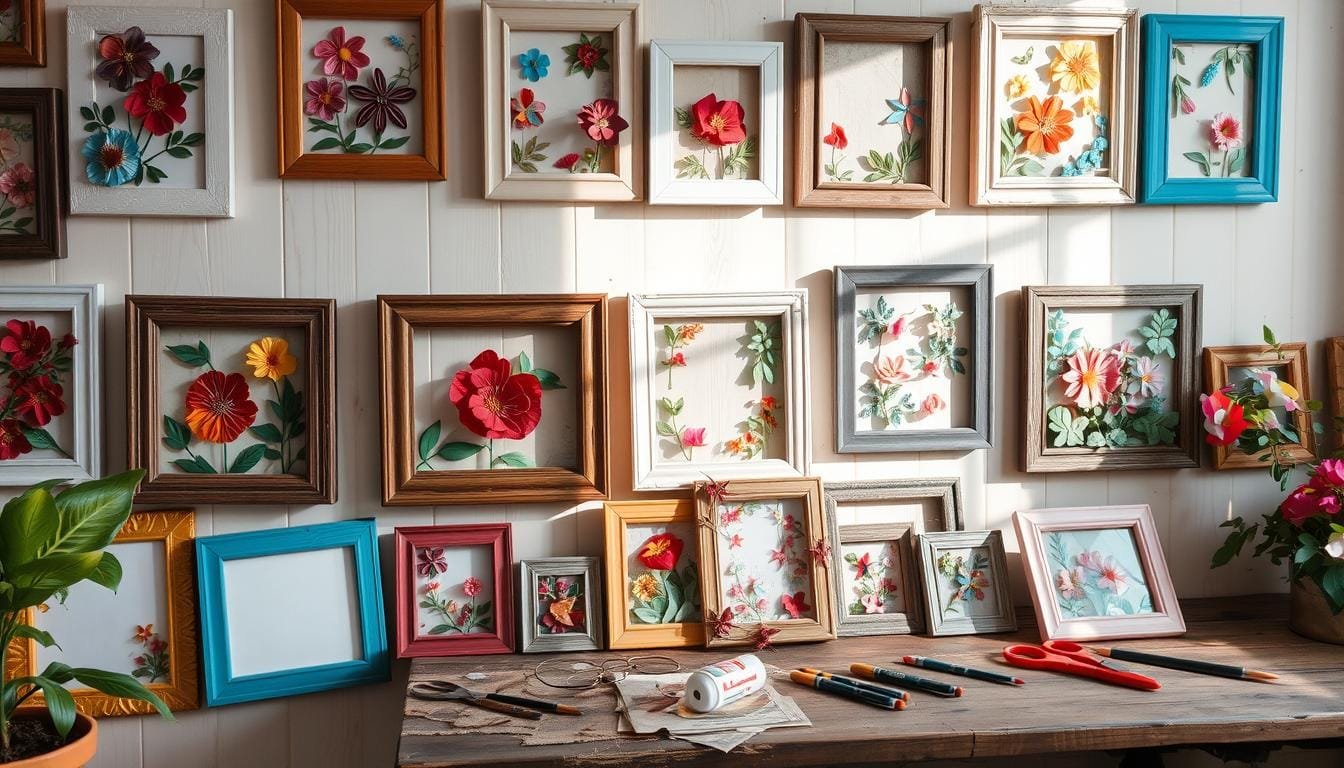
Seasonal Variations and Theme Ideas
As the seasons change, I love finding new ways to decorate my table. For Christmas, I use napkins with holly, snowflakes, or Santa to set the mood.
Winter holidays bring out snowmen, pinecones, or evergreen designs. These add a magical touch to the table.
Choosing the right colors is key for each holiday. Christmas is all about reds and greens. Winter holidays are perfect for blues and silvers.
By matching my decoupage with the holiday, I create a beautiful tablescape. It’s something I look forward to every year.
Whether it’s candles, place card holders, or napkin designs, I enjoy making my table special. With a bit of creativity, I can easily change my space to match the season. This includes Christmas or the winter wonderland.
Source Links
- https://livinglargeinasmallhouse.com/easy-woodland-christmas-tablescape/
- https://blueskyathome.com/how-to-diy-a-christmas-coffee-table/
- https://www.diyhomestagingtips.com/2020/12/how-you-can-easily-create-festive-but.html
- https://www.reinventeddelaware.com/decoupage-paper-for-furniture/
- https://modpodgerocksblog.com/essential-decoupage-supplies/
- https://www.themakersmap.com/decoupage-christmas-diy-decor-ideas/
- https://inmyownstyle.com/how-to-decoupage-furniture.html
- https://www.prima.co.uk/craft/papercraft/a21431/get-started-decoupage/
- https://blueskyathome.com/lighted-christmas-tablescape-sponsored-by-wayfair/
- https://myhomeandtravels.com/how-to-set-a-table-for-christmas-without-christmas-dishes/
- https://modpodgerocksblog.com/homemade-christmas-decorations/
- https://www.thepondsfarmhouse.com/easy-napkin-decoupage-christmas-ornaments/?srsltid=AfmBOopOYfKuebV5buYDuQKrMkXTtwab1nFBOQQr0itDHZ_fTJn9KG57
- https://blueskyathome.com/how-to-make-easy-diy-decoupage-christmas-ornaments/
- https://sustainmycrafthabit.com/paper-napkin-cardinal-decoupage-craft-idea/
- https://www.thepondsfarmhouse.com/farmhouse-christmas-tour-stunning-diy-holiday-decor/?srsltid=AfmBOookJhVDG0rrvSrRgCdcoFfiKgJDThEXGGQCdGHCvFgdBKTBYdQ6
- https://decoupagenapkins.com/blogs/project-ideas-blog/how-to-make-charming-diy-christmas-decor-for-a-cozy-holiday-home?srsltid=AfmBOorIrA-TDdbOGsmELgP6fdJw8jnbV9Swi7UawYHh7dfwgoGHZ16C
- https://modpodgerocksblog.com/diy-christmas-candle-holders/
- https://medium.com/@DixieBellePaint/quick-and-easy-holiday-decor-hacks-40f16cb5ca03
- https://modpodgerocksblog.com/diy-place-card-holders/
- https://www.exquisitelyunremarkable.com/2021/11/thanksgiving-decoupaged-dictionary-page.html
- https://thepostmansknock.com/10-artistic-ideas-for-holiday-place-cards/?srsltid=AfmBOorj1r_vscYDO3zxst082yBZVGBGrhu5kCkjSwr7ie5BWKtgpEQS
- https://jenniferrizzo.com/diy-decorative-decoupage-bee-dish-and-free-bee-and-honeycomb-printable/
- https://www.thepondsfarmhouse.com/how-to-make-a-diy-decorative-box-with-napkin-decoupage/?srsltid=AfmBOooho4lARRDi9ovb7AJAN7l6uoR61LVzGJSuWWcrWO30TB54IFU1
- https://livinglargeinasmallhouse.com/how-to-decoupage-napkins-on-a-glass-plate/
- https://betweennapsontheporch.net/ending-the-year-with-3-truly-beautiful-christmas-holiday-tables/
- https://designeddecor.com/christmas-dining-room-decorating/?srsltid=AfmBOooeXYZLl9_UNi9aL2i-Wvi9gD3rOgs9qbXueYAqgHQenmNE-rqA
- https://www.blesserhouse.com/how-to-change-the-look-of-your-christmas-decor-each-year-inexpensively/
Jen is a healthcare pro by day and a DIY enthusiast by night, bringing creativity to life on JF Craft Corner! From decoupage to Cricut crafts, she’s all about making DIY magic (and a little mess). She also co-runs The Heart of Mindful Living blog and podcast, inspiring others to refresh their minds and nurture their souls. Her trusty sidekick? Fergus, her chocolate Shih Tzu and certified therapy dog, always on cuddle duty. Jen believes true leadership starts with kindness—and, of course, a little glitter!