Craft Room Spring Cleaning: Your Guide to a Refresh
Ever thought about why our creative spaces get so messy? Spring cleaning is here to change that. It not only makes your space look better but also sparks new ideas. In this guide, I’ll show you how to organize your craft room step by step. This will make crafting more fun and productive all year.
Key Takeaways
- Spring cleaning promotes a healthier, more organized space for crafting.
- Statistics show that up to 80% of crafters face clutter issues annually.
- Effective craft room organization can lead to a 25% boost in creativity.
- Labeling containers reduces duplicate purchases for 75% of users.
- Developing tailored storage solutions is key for managing limited spaces.
Why Spring Cleaning is Essential for Your Craft Room
Spring cleaning is key for your craft room. Craft supplies pile up fast, causing chaos. A tidy space boosts creativity and productivity, letting you focus on making.
Spring cleaning helps you know what you have and what you need. It’s shown that 40% of people get more creative when their craft space is organized. Plus, it makes finding supplies quicker, saving you time.
A clean workspace is good for your mind too. It can cut stress by 40% and make you feel more relaxed. Keeping your room tidy promotes healthy habits and better emotional health.
Refreshing your craft space brings new ideas. It motivates you to start new projects, making crafting more fun. A clean space is where creativity and innovation thrive.
Preparing for Your Spring Cleaning Journey
Spring cleaning in your craft room is exciting and important. A clean space boosts your creativity and productivity. Let’s look at some steps to make it easy and fun.
Gathering Your Essential Cleaning Supplies
Start by making a list of cleaning supplies you need. Here are some must-haves:
- Microfiber cloths
- Vacuum cleaner with attachments
- All-purpose cleaner
- Rubber gloves
Having these tools ready will make cleaning easier. It helps you deal with dust, dirt, and clutter.
Creating a Craft Room Spring Cleaning Checklist
Now, make a spring cleaning checklist for your craft room. A detailed plan keeps you motivated and on track. Include tasks like:
- Pull everything out
- Clean your space thoroughly
- Categorize your supplies
A checklist helps you stay focused and ensures you cover all important areas. It’s also a great motivator. Remember, 80% of people get inspired to organize more after completing one area. Let your creativity grow!
Step 1: Pull Everything Out
Let’s start by pulling everything out of your craft space. This might seem overwhelming, but it’s a key step to take control. Clear a big area on the floor for sorting. Check every drawer, cupboard, and box.
You might find forgotten treasures that spark new ideas or can be donated. This inventory check gives you a fresh look at what you have. You might find duplicates or supplies you no longer like.
With everything out, you can make better choices about each item. Seeing the amount of materials you have helps clear your mind. It reduces the feeling of being overwhelmed by clutter.
| Benefits of Pulling Everything Out | Impact |
|---|---|
| Increased organization | Up to 25% improvement in space utilization |
| Reduction in anxiety | 30% increase in anxiety levels in cluttered homes |
| Enhanced productivity | Nearly 40% increase when areas for tasks are defined |
| Time savings | 50% reduction in time searching for items with labeled containers |
Starting small can make a big difference. Don’t try to do everything at once. Take it one step at a time. With each item you assess, you gain control, making your crafting journey more enjoyable.
Step 2: Clean Your Space
After pulling everything out, it’s time to refresh your craft area. Clean it well for a fresh start. We’ll look at how to keep your tools and machines clean, and the surfaces around them.
Deep Cleaning Craft Machines and Tools
Deep cleaning your craft tools is crucial for their best performance. Begin with your sewing machine, Cricut, or Silhouette. A damp cloth is very effective. Clean all surfaces, focusing on areas where dust hides.
Regular care not only extends your machines’ life but also improves your crafting experience.
Using Proper Cleaning Agents for Different Surfaces
Choosing the right cleaning agents is important. Use gentle cleaners for different materials. This step is vital for keeping your tools and space in good condition.
For hard surfaces, a mix of vinegar and water works well. For soft fabrics, use specialized cleaners. These steps help keep your workspace clean and your machines working well.
| Cleaning Task | Recommended Cleaning Agent | Surface Type |
|---|---|---|
| Wipe down sewing machine | Damp microfiber cloth | Metal, Plastic |
| Clean Cricut | Vinegar and water solution | Plastic, Vinyl |
| Dust work surfaces | All-purpose cleaner | Wood, Laminate |
| Clean fabric surfaces | Upholstery cleaner | Fabric, Upholstery |
With the right cleaning agents and deep cleaning, refreshing your crafting space is rewarding. Let’s keep our creativity flowing in a clean and organized space!
Step 3: Sort Into Piles
After clearing your craft space, it’s time to sort your supplies. This step is key for organizing your crafting materials well. Start by grouping craft supplies by type or use. This makes finding what you need for your next project easy.
Grouping Based on Craft Types
Begin by sorting items by the crafts you like. For example:
- Sewing materials
- Paper crafting supplies
- Painting tools
- Jewelry making components
By grouping craft supplies this way, you’ll make crafting easier. You’ll also find materials quickly when you need them.
Organizing by Supply Type
Organizing by supply type is another good method. Create piles for:
- Markers, pens, and pencils
- Fabrics and threads
- Glues and adhesives
- Stickers and embellishments
This helps you see all your supplies at once. It also helps with organizing crafting materials. Check each item regularly. If you haven’t used it in six months, it might be time to get rid of it.
Step 4: Donate or Retire
This step is crucial for a functional and inspiring space. You need to decide what to keep and what to let go. Make two piles: one for donations and another for items to retire.
If you haven’t used something in over a year, it might be time to let it go. Group duplicates or unused items at the back of your shelves. These are great for donating.
When I cleaned my 16 x 20 feet space, getting rid of outdated items felt liberating. It’s important to be honest during this process. I donated fabric to a local quilt group for cancer patients. This not only cleared space but also helped others.
I still have yarn to sort through, though! If you have many supplies like washi tape, mini ink pads, or papers, go through the same evaluation.

- Consider functionality: Does the item help with your current projects?
- Acknowledge duplicates: Do you have more than one of the same item?
- Evaluate frequency of use: If it hasn’t been used in a year, it might be time to retire it?
By doing this, you’ll simplify and organize your creative space. You’ll also help others. Remember, 50% of craft room owners donate or discard items every year. Let’s make this year count! Your craft room will feel lighter, and you’ll have space for what you love.
| Material Type | Decision | Next Steps |
|---|---|---|
| Fabric | Donate | Contact local quilt group |
| Yarn | Retire | Consider alternative uses or gifts |
| Old Paint Supplies | Recycle | Locate a local recycling center |
| Washi Tape | Keep | Organize into labeled containers |
By taking these steps, you’ll create a space where creativity flows. Deciding what to keep or let go is a powerful act. It’s essential for a joyful environment.
Step 5: Find the Right Storage Place
Effective craft storage solutions make your crafting space better. It’s key to pick places that are easy to get to and see what’s inside. Clear storage totes are great for this. They let you see your materials, like beads and yarn, easily.
How to Choose the Best Storage Solutions
Here are tips for picking the right storage:
- Assess Your Space: Look at where you have space, like a corner or a shelf.
- Prioritize Accessibility: Keep things you use a lot close to you.
- Consider Vertical Space: Use shelves to save space and make your room bigger.
- Make it Personal: Pick storage that fits your style and inspires you.
Utilizing Clear Storage Totes for Visibility
Clear storage totes help you see what you have. They also help you organize your supplies. Here’s how:
| Storage Type | Best For | Visibility |
|---|---|---|
| Clear Totes | Small supplies, yarn | High |
| Shelving Units | Larger materials | Medium |
| Drawer Organizers | Tools, smaller items | Medium |
| Portable Carts | On-the-go crafting | Medium |
Organizing your space makes it tidy and useful. With these storage tips, your craft area will be a place of inspiration. It will be ready for many fun and productive crafting times.
Spring Cleaning for Your Craft Space
After sorting and cleaning your supplies, take a moment to enjoy your refreshed craft space. Spring cleaning your craft space shows how a tidy environment boosts creativity and improves your experience. An organized craft room sparks inspiration and makes your work more efficient.
- Utilize Artbin Vinyl Storage Towers, which efficiently hold up to 36 rolls of vinyl each. Stacking two towers increases your capacity to 72 rolls.
- Incorporate an Artbin Desktop Organizer with 24 tool slots to keep your essential tools at your fingertips while providing extra storage for smaller supplies.
- Use the Artbin Paint Storage Tray, designed to accommodate 21 bottles of your favorite 4 oz paint, ensuring easy access during projects.
- Organize photos with the Artbin Photo and Craft Organizer, holding up to 100 photos in each mini compartment, making it perfect for keeping memories neat.
- The Artbin Super Satchel Double Deep offers customizable compartments for versatile supply organization.
- Vinyl Roll Holder with 60 compartments with door hooks and strap to hang in your closet. If you are a collector of vinyl like I am, this is a perfect solution to hold my hoard (I mean collection) of vinyl.
Creating designated boxes for items you wish to keep, donate, or discard greatly simplifies the cleaning and organization process. This strategy not only categorizes your supplies but also clarifies your crafting goals. Frequent clutter zones like the fabric shelf and tool peg board need attention to maintain workflow.
Acknowledge that even small improvements can lead to significant usability enhancements. The existence of clutter-free drawers and designated wrapping stations contributes to a positive crafting experience. Investing 2-3 hours into thorough spring cleaning helps achieve the desired results, transforming your craft room into a sanctuary of creativity.
Step 6: Last Cleaning Touches
Before you start your next crafting project, give your workspace a good clean. These final touches make your space welcoming for your next creative adventure.
Start by vacuuming any leftover debris from your cleaning. Make sure to get into corners and under furniture where dust likes to hide. A clean area boosts your creativity and focus.
Then, wipe down all surfaces to remove dust. Choose the right cleaner for your countertops. This step not only makes your space look fresh but also keeps it clean. Keeping your area tidy prevents clutter and dirt, making it a pleasure to craft.
- Vacuum thoroughly, focusing on hidden areas.
- Dust all surfaces, including shelves and windowsills.
- Clean your floors to remove any last remnants.
Take a moment to appreciate your hard work. These final steps will help you have inspired crafting sessions. With your clean area, you’ll be excited to start your next project!

Refresh Your Crafting Materials and Supplies
When you start organizing, it’s a great time to refresh your crafting stuff. A tidy space makes things easier to find and boosts your creativity. Making sure everything has its place makes crafting more fun.
Organizing Crafting Materials for Easy Access
Begin by checking out what you have. Most crafting stuff doesn’t get used much. Sorting through helps clear out the old and find new favorites. Use bins or drawer organizers to keep things in sight.
This way, you won’t buy the same things twice. Often, half of what we buy ends up unused.
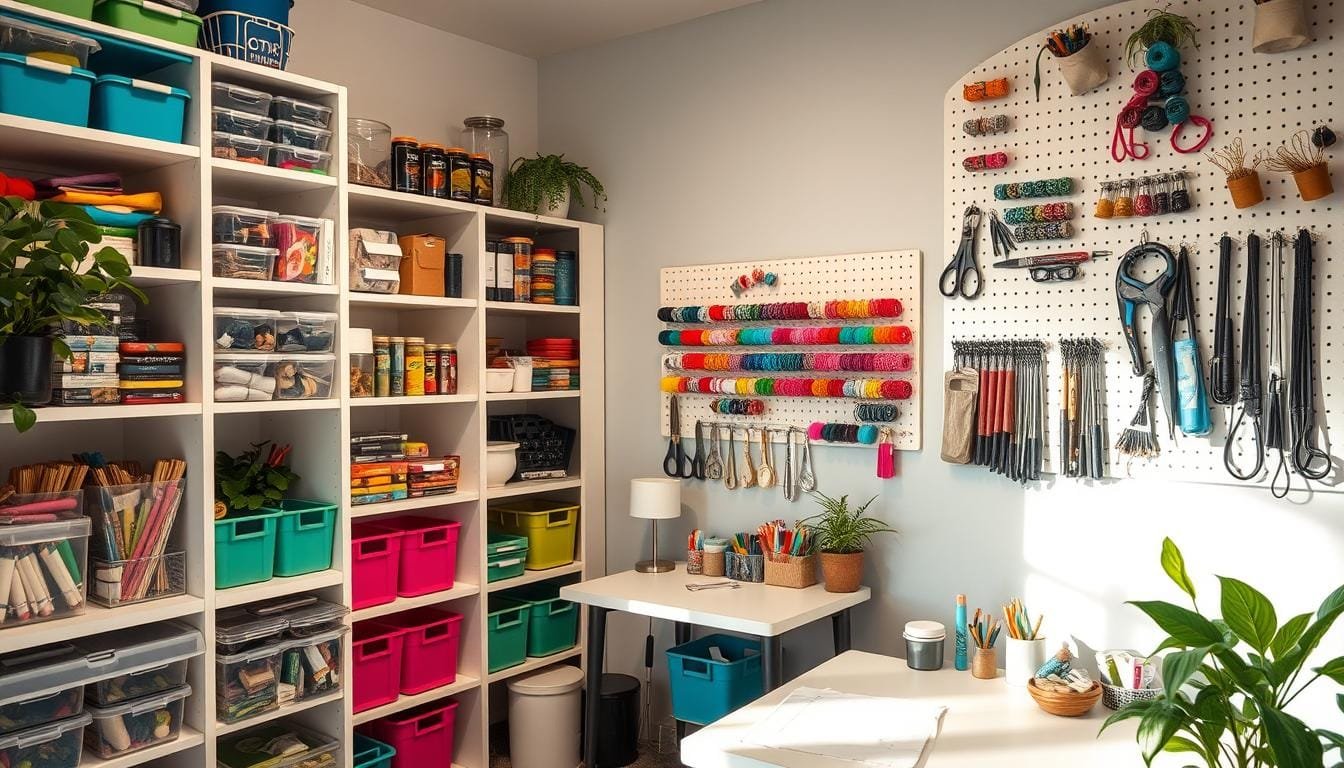
Implementing DIY Craft Room Organization Ideas
There are many ways to make your craft room better. Pegboards are great for hanging tools. They keep things within reach.
Wall organizers save table space. This can make up to 40% more room for working. Pick furniture that does more than one thing, like tables with storage. Cleaning up regularly can make you more productive and keep your space looking good.
| Organization Idea | Benefits |
|---|---|
| Clear Labeled Bins | Easy visibility and access; minimizes repurchases |
| Pegboards | Efficient use of vertical space; keeps tools handy |
| Wall-Mounted Organizers | Increases workspace; reduces clutter on tables |
| Multi-Functional Furniture | Maximizes area and provides hidden storage |
Trying these ideas can make crafting more fun and productive. Let’s explore these solutions together!
Creative Space Organization Tips
Creating a welcoming and useful craft room is more than just cleaning up. To boost your craft room’s efficiency, try these key strategies for organizing your space:
- Use vertical space: Add shelves or hooks to your walls. This not only frees up floor space but also keeps your supplies within reach.
- Incorporate stylish baskets: They look good and are great for storing small items.
- Regularly reassess: It’s important to check and adjust your organization system often. As you get new supplies and start new projects, your space needs to change too.
These tips can change your space and make it more inspiring for crafting. Creativity grows in a tidy space. So, keeping your area organized will make your crafting better.
Maintaining Your Newly Organized Craft Room
Organizing your craft room is just the start. To really enjoy your space, keeping it organized is key. Craft rooms can get messy fast, thanks to multiple users. Regular cleaning keeps your space inspiring and useful.
Setting Up Routine Declutter Sessions
Having a regular declutter day, like once a month, can make crafting better. Use these times to check your supplies, give away what you don’t need, and make sure everything is where it should be. Here’s a simple way to keep things tidy:
- Designate specific days for decluttering.
- Keep track of items you haven’t used in a year. If it doesn’t make you happy, get rid of it.
- Involve family or crafting friends to share ideas on what to keep or throw away.
To be more efficient, finish each project before you start cleaning up. This way, you focus on organizing right after you’re done. This method helps you stay organized and boosts your creativity.
| Benefit | Details |
|---|---|
| Increased Productivity | 70% of crafters feel more productive in a tidy space. |
| Reduced Search Time | Crafters spend 15% of their time looking for supplies in messy spaces. |
| Enhanced Creativity | 80% of people say they’re more creative after cleaning their craft areas. |
Setting aside time for decluttering not only keeps your space neat but also boosts your creativity. It’s not about how much stuff you have, but how organized it is. See these sessions as a chance to refresh your space and keep it organized for good.
Conclusion
As we finish this guide on spring cleaning for creative spaces, it’s clear. A tidy craft room boosts your crafting fun. By spending time to clean up, you cut down on mess and spark creativity.
A clean space helps you think clearly. This makes it easier to try out new ideas and skills.
I hope this guide has motivated you to create a neat craft room that shows off your creativity. Keep your space organized by doing small clean-ups often. View spring cleaning as a chance to revitalize your crafting, not just a yearly task.
By keeping your craft area neat and calm, you’ll enjoy crafting more. Let’s turn our creative spaces into places of joy and inspiration. In an organized craft room, every project starts with excitement!
FAQ
How often should I spring clean my craft room?
What are some easy craft storage solutions I can implement?
What should I do with supplies I no longer need?
Can I use regular cleaning supplies for my craft space?
How can I keep my craft room organized after spring cleaning?
Source Links
- https://www.thewonderforest.com/craft-space-organization-and-storage-ideas/
- https://heyletsmakestuff.com/organize-your-craft-room/
- https://craftifymylove.com/2018/01/03/craft-room-challenge-confessthemess/
- https://charlesfarris.com/mood/the-importance-of-a-spring-clean/?srsltid=AfmBOoq_YO4BCHceDTups95tvIS4ws3-ZqiE7rhZ9dc3_nZ-ZGdyOiCv
- https://www.drewandjonathan.com/how-to/spring-cleaning-checklist/
- https://powerofmoms.com/spring-cleaning-in-a-whirlwind/
- https://www.createroom.com/blogs/news/spring-organization-tips-crafters
- https://levtexhome.com/blogs/news/spring-organization?srsltid=AfmBOopoaZizbiLCR5Qmzlt8pucNwJeTVBAspkjWKZIEGUkUpHSteZjG
- https://www.thehandmadehome.net/our-favorite-spring-cleaning-tips/
- https://www.wrtv.com/news/local-news/fishers-organization-expert-provides-tips-as-spring-cleaning-arrives
- https://thecrownedgoat.com/spring-cleaning-organizing-task-list-made-easy/
- https://www.createroom.com/blogs/news/craft-room-spring-cleaning-tips
- https://cleanmyspace.com/clean-your-closet/
- https://www.home-storage-solutions-101.com/declutter-craft-room.html
- https://altenew.com/blogs/paper-crafting-inspiration-and-tips/how-to-declutter-your-craft-room-in-8-easy-steps?srsltid=AfmBOopXH1Zglc7qHBXZgFKPrSqfvRZLhStwy-DEEkWnyX1Vwa_vdr3q
- https://positivelyjane.net/blog/craft-room-organization-and-tour/
- https://theredpaintedcottage.com/make-your-craft-room-work-for-you/
- https://juststampin.com/2020/01/26/craft-room-organization-tips/
- https://www.sigonimacaroni.com/spring-clean-your-yarn-stash-in-5-easy-steps/
- https://nourishingminimalism.com/declutter-organize-craft-room/
- https://organizedwithkids.com/how-to-organize-a-craft-station-for-kids-like-a-pro/
- https://www.artbin.com/artbin-blog/Easy-Spring-Cleaning-and-Organization-Ideas-for-Your-Craft-Room
- https://www.teadoddles.com/spring-cleaning-for-the-craft-room/
- https://queenofclean.blog/2017/03/13/queen-of-clean-spring-cleaning-schedule/
- https://girlfridaycrafts.com/blog/spring-cleaning-tips-for-your-craft-space
- https://www.whitehouseblackshutters.com/decluttering-craft-supplies/
- https://www.abbikirstencollections.com/craft-room-organization-free-printables/
- https://www.myperpetualproject.com/lets-organize-the-craft-room/
- https://www.acherryontop.com/forum/viewtopic.php?t=274426&srsltid=AfmBOoqMVDduPMOr70E8iiXbQ6JyCK4iSMoSwadhluqz520krIN7Qs3a
- https://www.plymouthyarnmagazine.com/2019/05/16/spring-cleaning-marie-kondo-craft-space/
- https://www.smartfundiy.com/organize-craft-room-overwhelm/
- https://www.sizzix.com/blogs/news/craft-room-clean-up
- https://www.younghouselove.com/crafty-mccrafterson-2/
- https://www.visitingangels.com/arlingtonheights/articles/the-benefits-of-spring-cleaning-for-seniors/22509
- https://www.brunswickcrossing.com/blog/6-easy-tips-for-a-spring-cleaning-fresh-start
Jen is a healthcare pro by day and a DIY enthusiast by night, bringing creativity to life on JF Craft Corner! From decoupage to Cricut crafts, she’s all about making DIY magic (and a little mess). She also co-runs The Heart of Mindful Living blog and podcast, inspiring others to refresh their minds and nurture their souls. Her trusty sidekick? Fergus, her chocolate Shih Tzu and certified therapy dog, always on cuddle duty. Jen believes true leadership starts with kindness—and, of course, a little glitter!