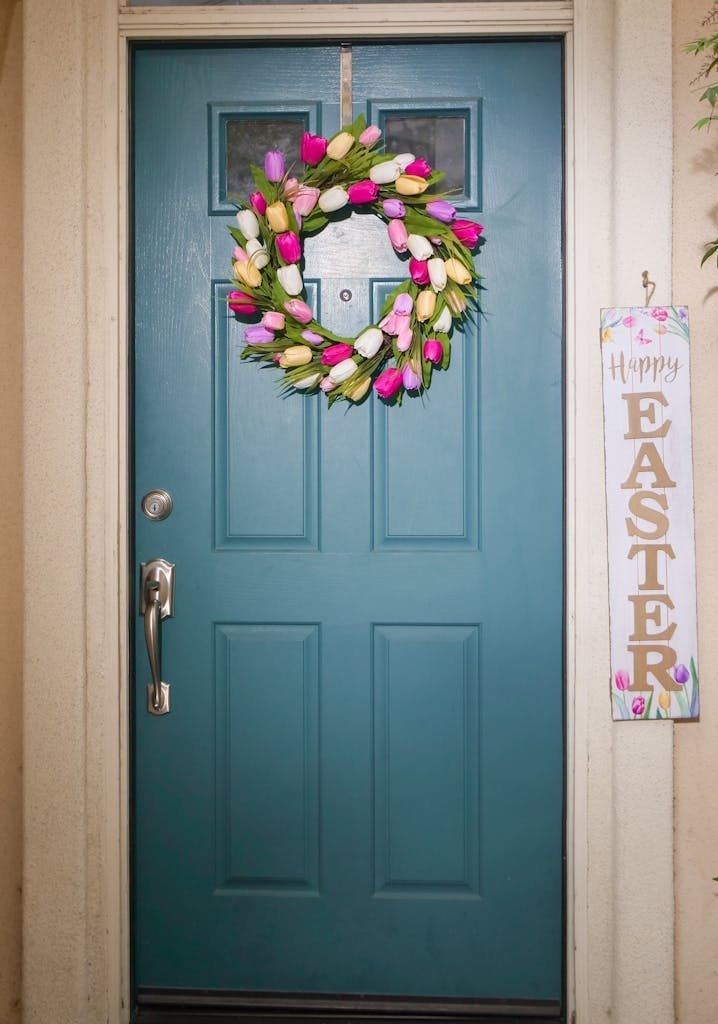
DIY Door Wreaths: Welcome the Spring Season
Ever thought a simple door wreath could change your home’s entrance? It can make it feel warm and inviting. As winter fades, it’s the best time to welcome spring with DIY door wreaths. Making a wreath is a fun way to show your love for spring’s beauty.
In this guide, I’ll share secrets for making seasonal wreaths. We’ll look at many wreath designs, from easy to complex. No matter your skill level, these tips will help you turn your front door into a spring display.
Key Takeaways
- 35 unique DIY door wreath designs to inspire your spring decor.
- Create a beautiful Nigella and Protea Wild Floral Wreath in approximately 5 minutes.
- The Rainbow Tulip Wreath can be completed in just 20 minutes.
- Rattan wreath bases are recommended, used in over 3 spring projects.
- Artificial or faux flowers are prevalent, favored by at least 10 artists for DIY wreaths.
- Creative shapes like the Moss Purse Wreath introduce design diversification.
- Common supplies include greenery, ribbons, and floral components.
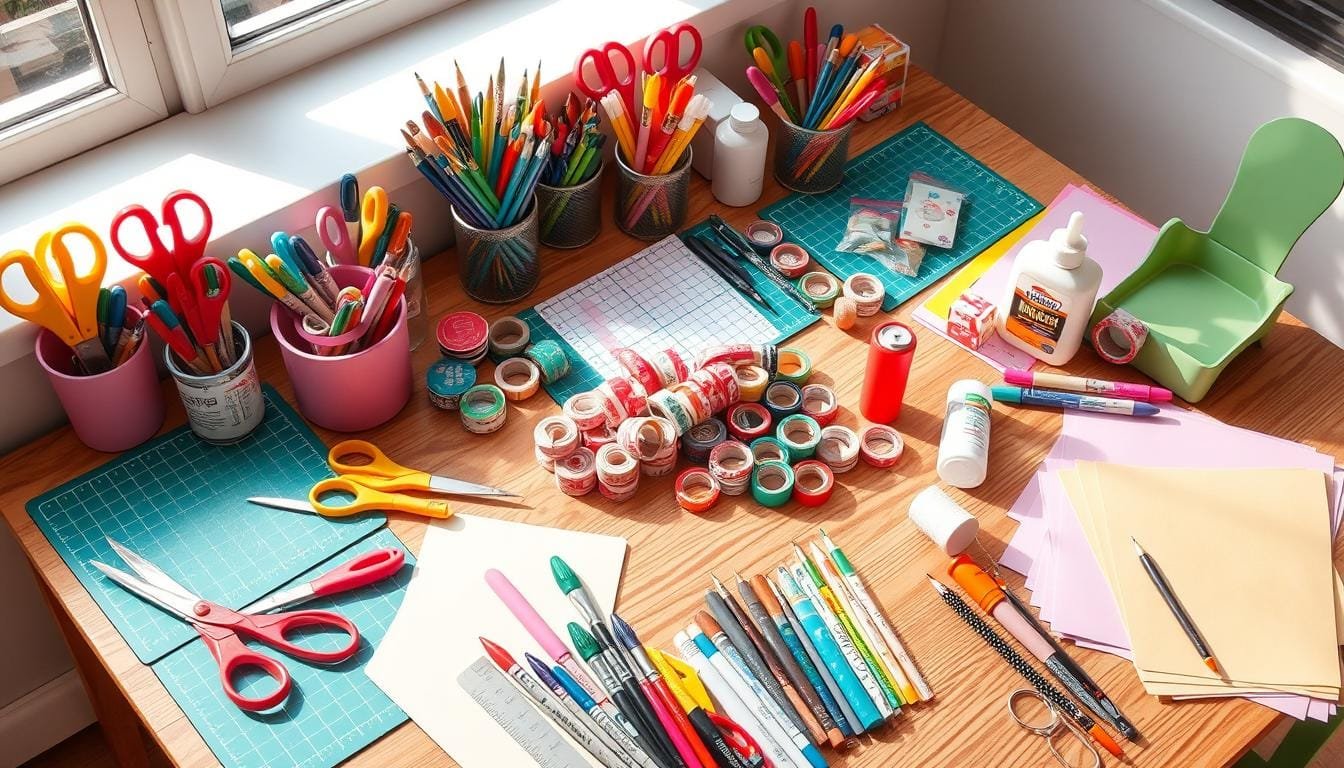
Materials You Will Need for DIY Door Wreaths
Before starting our DIY spring wreath tutorial, it’s important to gather all the necessary materials. We’ll cover the tools, decorative elements, and the wreath base. These are the key parts of your project.
Essential Tools
First, make sure you have the essential crafting tools ready. Here’s a quick list of what you’ll need:
- Wire cutters – Perfect for clipping stems and wires.
- Floral tape – Great for securing your elements snugly together.
- Glue gun – Ensures that decorations stick firmly to the base.
These tools make your DIY spring wreath tutorial easier and less stressful.
Common Decorative Elements
Now, let’s talk about adding personality and flair to your wreath. Common decorative elements include:
- Artificial flowers – Faux flowers like pink peonies and tulips offer longevity and ease of maintenance.
- Fabrics and ribbons – Use different shades, like sheer pink ribbons, to create exquisite bows.
- Natural embellishments – Pine cones, berries, and palm leaves add unique texture and charm.
These elements not only look great but also save you time on upkeep. For example, using faux flowers means no watering.
Choosing the Right Base for Your Wreath
Lastly, picking the wreath base options is crucial. It shapes your overall design. Decide between:
- Grapevine – Available at all craft stores or Amazon, typically 16-20 inches in diameter.
- Foam – Light and easy to work with.
- Wire frames – Durable and provides a sturdy structure.
Your base choice greatly affects your wreath’s look and durability. Each option has its own benefits, so pick the one that fits your vision.
| Wreath Element | Details |
|---|---|
| Artificial Flowers | Pink peonies and tulips, preferred for their longevity |
| Ribbons | 5 shades of sheer pink ribbons for the bow |
| Wreath Base | Grapevine base, 16-20 inches in diameter |
| Tools | Wire cutters, floral tape, glue gun |
Simple Step-by-Step DIY Spring Wreath Tutorial
Let’s start our fun journey of making DIY spring wreaths! First, make sure your workspace is ready. This makes crafting easier and keeps you excited.
Preparing Your Work Area
First, set up your work area. You’ll need a big, clean space for all your stuff. Cover it with a drop cloth or newspaper to catch spills.
Have all your tools like a hot glue gun and wire cutters nearby. With everything organized, you’re ready to begin!
Step-by-Step Instructions
- Choose Your Base: I like using a grapevine wreath. You can find great deals on them. My 18-inch wreath was just $4.50 at a sale.
- Arrange Your Greenery: Start with your greenery. I used ferns and leaves, which I bought at a discount. Place stems at key points and fill in the gaps.
- Add Floral Elements: Add flowers like hydrangeas, tulips, and peonies for a spring look. Place them unevenly for a trendy look.
- Incorporate Decorative Elements: I added a painted birdhouse and artificial bird eggs for fun. They make your wreath special.
- Customize Your Sign: Make a “Home Sweet Home” sign with a popsicle stick. Resize it and use a wood burner for the letters.
- Secure Everything: Use wire to keep everything in place. Hot glue is also good for foam bases, as it helps with securing foliage.
- Final Touches: Wrap twine around the wreath for a neat finish. Use about 5 to 10 feet of twine for the best look.
Troubleshooting Common Issues
Having trouble with your DIY spring wreath? Here’s how to fix common problems:
- Uneven Appearance: Check how you arranged your elements. Make sure they’re spread out evenly. Add more if needed.
- Loose Elements: Make sure everything is securely attached. Use more wire or hot glue if it’s not tight.
- Difficulty Hanging: Use a strong hanging method like wires or ribbons. Most crafters find this works best.
By following these steps and solving problems, you’ll have a beautiful spring wreath. Happy crafting!
Welcome Spring with DIY Door Wreaths
Spring is a time of renewal and growth. It’s the perfect season to make your own door wreaths. When I think of “spring wreath inspiration,” I see vibrant greens, cheerful yellows, and soft pinks. These colors bring spring to life and make any front door beautiful.
Making a DIY Spring Wreath
Making a spring wreath doesn’t have to be expensive. You can get all the supplies needed for under $40. I bought a giant egg-shaped grapevine wreath for just $7.99. Using a 40% off coupon at Hobby Lobby, I saved $3.20 on it! This wreath form is 24 inches and fills a whole door space.
Let’s talk about materials. You can find lots of floral supplies at Hobby Lobby. From cream and pink magnolia flowers to pink cherry blossom sprigs, there’s plenty to choose from. Adding greenery like a 6-foot mini green ficus garland makes your wreath look lush. You’ll need a hot glue gun and floral wire cutters to attach these elements. If you’re adding vinyl designs, an electronic cutting machine is useful.
Wreath-making can be a calming activity. I’ve made about one wreath a month for the last three months and I’ve tried different themes, from whimsical butterflies to rustic spring designs. I’ve used common household items and gardening tools to make each piece unique and meaningful.
Whether you’re making a simple seed-packet wreath or a more complex design, the fun is in the making. Seasonal trends like eucalyptus, peonies, and tropical themes are popular. These themes not only celebrate spring but also add a trendy touch to your decor.
Here’s a quick overview of what you’ll need for your spring wreath inspiration:
| Materials | Details |
|---|---|
| Grapevine Wreath Form | Available for $7.99; use 40% off coupons to save |
| Floral Supplies | Cream and pink magnolia flowers, pink cherry blossom sprigs |
| Greenery | 6-foot mini green ficus garland (use half) |
| Tools | Hot glue gun, floral wire cutters, electronic cutting machine |
| Additional Elements | Household items like egg cartons, gardening tools |
Creative Spring Door Wreath Ideas
Spring is the perfect time to refresh your home decor with some creative door decor for spring. There are many spring door wreath ideas to choose from. You can easily enhance your entryway and invite the season’s beauty into your home. Here are some delightful ideas to get your creative juices flowing.
Spring Birdhouse Wreath
A Spring Birdhouse Wreath adds a charming, rustic touch to your front door. Imagine a small birdhouse nestled among faux tulips, garden roses, and pastel-colored flowers. Use a grapevine base for a natural look and attach the decorations with florist wire and hot glue. This design is not only lovely but also celebrates the return of our feathered friends in spring.
DIY Boxwood & Bicycle Spring Wreath
Channel leisurely spring days with a DIY Boxwood & Bicycle Spring Wreath. This whimsical wreath uses boxwood greenery as the base, paired with a miniature bicycle adorned with faux lavender and ranunculus. It’s a playful nod to outdoor adventures and adds a delightful twist to seasonal wreath crafts. Use jute-lined wire forms for durability, and don’t forget to include a pastel color scheme for that fresh spring vibe.
Buffalo Check Paper Flower Wreath
For a modern and playful look, try a Buffalo Check Paper Flower Wreath. This design features vibrant paper flowers set against a backdrop of buffalo check fabric. It’s a fantastic way to incorporate trendy patterns into your door decor. Craft paper flowers like tulips and garden roses, and use decoupage medium to attach them securely. This wreath is both eye-catching and full of spring door wreath ideas that will surely make your front door stand out.
These spring wreaths are just a few examples from a plethora of creative door decor for spring. By using materials like faux flowers, jute-lined wire forms, and various adhesives, you can create a stunning array of designs to showcase your inner creator. So, gather your crafting supplies and let’s bring some seasonal charm to your home!
How to Make a Door Wreath for Spring
Let’s start making a beautiful spring door wreath. It’s a great way to welcome spring with color and personal touch. I’ll share DIY tips and step-by-step guidance to help you create your vision.
First, pick the right materials. Spring wreaths often use fresh flowers, greenery, and sometimes eggs and butterflies. Here are four popular base materials to consider:
- Grapevine – Offers a rustic look, ideal for natural themes.
- Twine – Flexible and versatile, great for intricate designs.
- Bendable Boughs – Perfect for a sturdy, organic feel.
- Metal Hoops – Provides a modern, minimalist appearance.
When making your wreath, layer your materials for balance. Start with your base materials using a hot glue gun. Use flowers and greenery for about 50% of your design. Add seasonal items like May Day cones or plastic lemons for unique touches. Here’s a detailed table with materials and steps:
| Materials | Usage | Tips |
|---|---|---|
| Fresh Blooms & Foliage | Main decorative elements | Use sphagnum moss for longevity |
| Twine or Bendable Boughs | Base construction | Ensure flexibility |
| Hot Glue Gun | Attaching elements | Allow a couple of hours to dry |
| Faux Flowers & Butterflies | Decorative elements | Increases durability |
| Plastic Lemons | Themed embellishments | Use about 12-15 for a balanced look |
It’s important to keep your wreath fresh. Replace wilted flowers and reapply hot glue to loose decorations. Use these DIY tips to keep your wreath looking great.
Making a spring wreath not only beautifies your space but also connects you to the season’s spirit. Happy crafting!
DIY Spring Wreath Tutorial: From Concept to Completion
Making a beautiful spring wreath is fun and rewarding. In this DIY spring wreath tutorial, I’ll show you each step. You’ll feel confident and inspired from start to finish.
Gathering Inspiration
Start by looking at nature and seasonal colors for ideas. Note what you like, like flowers or textures. For example, ranunculus and greenery make a vibrant wreath.

Designing Your Custom Wreath
After getting ideas, design your wreath. Choose a base, like foam wreath forms, which are light and easy to handle. Pick different flower colors for interest. Add ribbons and a welcome sign for extra details.
Final Assembly Steps
Now, follow these wreath assembly tips to make your wreath:
- Wrap your wreath form with greenery, using 2 bushes for a full look.
- Attach faux flower stems, 2 to 3 inches tall, into the greenery.
- Add decorative elements like a wooden fence cutout or a foam bird.
- Hang your wreath with suction cups or Command Strip hooks.
- Make sure everything is secure for a long-lasting wreath.
Here’s a quick overview of the key details:
| Yield | Active Time | Cost Estimate | Number of Steps | Types of Greenery Used | Flower Stem Chosen | Duration of Seasonal DIY | Average Age of Bowdabra Tool Mentioned | Hanging Options | Alternative Design |
|---|---|---|---|---|---|---|---|---|---|
| 1 wreath/project | 30 minutes | $20 | 6 steps | 2 bushes | Ranunculus | Spring | 20 years | Suction cups, Command Strip hooks | Wooden picket fence cutout, foam bird |
By following this DIY spring wreath tutorial, you’ll make a lovely wreath. It will show off your style and welcome guests to your home.
Easy Spring Wreath Designs for Beginners
Making a beautiful spring wreath is easy and doesn’t cost much. I’ll show you beginner wreath making tips that are simple and affordable. It’s a fun way to welcome spring.
Basic Design Principles
Knowing a few basic design rules can make your wreath look great. Start with color coordination for a nice look. Choose colors that go well together or stick to one color.
Balance is key: make sure things are even around the wreath. Mixing textures, like soft flowers with hard stems, adds interest.
Time-Saving Tips
Need a quick but beautiful wreath? Here are some tips:
- Use pre-made bows and picks for a fast fix.
- Hot glue can be slow; try floral wire instead.
- Go for a simple design like a garland wreath for a quick 15-minute project.
These easy spring wreath designs are perfect for beginners. They’re quick to make and still look great.
Inexpensive Material Sources
Finding affordable crafting supplies is key for those on a budget. Here are some good places:
- A.C. Moore: Great for seasonal deals and bulk items.
- JoAnn Fabrics: Offers sales and coupons often.
- Michaels: Has a wide range of affordable wreath-making supplies.
- Online stores like Amazon: Find unique items like faux succulents and ribbon packs.
Shopping at these places helps you make budget-friendly and beautiful wreaths.
Here’s a quick look at the cost and time for different DIY wreaths:
| Wreath Type | Average Cost | Time Required |
|---|---|---|
| Garland Wreath | $15 | 15 minutes |
| Rustic Spring Wreath | Less than $5 | Under 30 minutes |
| Wood Beaded Wreath | $20 | 30 minutes |
With these tips and resources, even beginners can make stunning, easy spring wreath designs without spending a lot.
Homemade Wreaths for Spring: Personal Touches
Adding personal touches to your wreaths makes them special. It’s more than just making wreaths for spring. It’s about adding elements that tell your story. Imagine using heirloom fabrics on a 14″ metal floral hoop from Hobby Lobby or Michaels.
- Heirloom materials: Use vintage ribbons or fabrics with sentimental value.
- Memorabilia: Add small tokens or keepsakes like old keys or tiny frames with pictures.
- Favorite flowers: Pick flowers that mean something special, like your wedding flowers.
Here’s a table showing costs, duration, and materials:
| Item | Cost | Duration (Years) | Examples |
|---|---|---|---|
| Simple Tulip Wreath | Under $10 | Several | Real touch tulips, faux forsythia |
| Seasonal Wreaths | Varies | Varies | Dogwoods, pink tulips, daffodils |
Personal touch crafts let you be creative. You can make unique DIY wreaths that show your style. Use thrifted materials, like a vintage basket with faux florals, to make something special.
Start with gypsophila stems for depth. Use floral wire or a hot glue gun to secure them. Then, add flowers for color. Finish with a velvet ribbon for hanging and an optional bow for extra texture.
Joining seasonal events, like a spring Pinterest challenge, can inspire you. Let your creativity flow, turning simple materials into amazing creations. These projects not only beautify your space but also give you a sense of pride.
Conclusion
As we finish our journey into DIY spring wreaths, it’s clear that making these decorations is fun and fulfilling. It’s a great way to welcome spring into our homes. Our content has been shared over 3.2k times, showing how much people love DIY spring wreath ideas.
Whether you’re inspired by our tips or just want to try seasonal crafts, making wreaths is magical. It lets you create something special with your own hands.
We’ve explored many materials, from terra cotta pots to floral wire, for different designs. Safety is key, but with care, these projects are fun and doable. Trends like moss mushrooms and bird nest picks keep inspiring us, showing the beauty of DIY.
It’s great to see more people choosing sustainable crafting, like using thrift store baskets or upcycling. This shows our community’s growing love for eco-friendly projects.
Our spring DIY series has had contributions from at least 15 bloggers, and the Handcrafted Society’s challenges keep us creative. Let’s keep enjoying these seasonal crafts together. Every wreath we make not only adds beauty but also brings joy and fulfillment.
Happy crafting, and may your spring be filled with joy and growth!
FAQ
What are some popular styles of DIY door wreaths for spring?
What materials do I need to make a spring wreath?
How can I personalize my spring wreath?
What are some easy spring wreath designs for beginners?
How do I gather inspiration for my DIY spring wreath?
What are the essential steps in making a spring door wreath?
Are there any specific tips for maintaining my spring wreath throughout the season?
What are some budget-friendly sources for wreath-making materials?
What troubleshooting tips can help fix common issues like an uneven appearance?
Source Links
- https://www.thepioneerwoman.com/home-lifestyle/crafts-diy/g39003622/spring-wreath-ideas/
- https://www.thehappyhousie.com/full-floral-diy-spring-wreath/
- https://blueskyathome.com/diy-garden-style-spring-wreath/
- https://persialou.com/diy-modern-spring-wreath/
- https://www.onsuttonplace.com/3-step-diy-spring-wreath/
- https://www.tingandthings.com/2018/03/diy-spring-wreath-for-front-door.html
- https://www.hallstromhome.com/how-to-make-a-spring-wreath-step-by-step-guide/
- https://livelaughrowe.com/diy-spring-wreath-for-front-door/
- https://taunieverett.com/diy-welcome-spring-wreath/
- https://www.countryliving.com/diy-crafts/g3096/diy-spring-wreaths/
- https://www.bhg.com/holidays/easter/decorating/easter-spring-door-decorations/
- https://www.amelialawrencestyle.com/spring-door-wreath-ideas/
- https://www.marthastewart.com/1537530/spring-wreaths
- https://vivanaturals.com/blogs/a-wealth-of-wellness/diy-spring-wreaths-to-brighten-your-door?srsltid=AfmBOoqgUAICqMnVsNjXRq9R7d7w3ozsmFdpfvUT4OcQgrf-0ogl2-BZ
- https://www.sophieallport.com/blogs/sophies-tips/how-to-make-a-spring-wreath
- https://myfamilythyme.com/easy-spring-floral-wreath/
- https://www.practicallyfunctional.com/diy-spring-welcome-wreath/
- https://www.artsandclassy.com/13-easy-diy-spring-wreaths-for-your-front-door/
- https://www.housewivesoffrederickcounty.com/simple-spring-wreath-tutorial/
- https://followtheyellowbrickhome.com/simple-spring-wreaths-and-door-decor-ideas/
- https://tylynnm.com/simple-diy-spring-wreath-a-pop-of-color-for-your-door/
- https://www.thehappyhousie.com/diy-spring-wreath/
- https://heatherednest.com/diy-terracotta-pot-spring-wreath/
- https://anorganizedseason.com/unique-diy-mushroom-wreath-in-a-thrifted-basket/
Jen is a healthcare pro by day and a DIY enthusiast by night, bringing creativity to life on JF Craft Corner! From decoupage to Cricut crafts, she’s all about making DIY magic (and a little mess). She also co-runs The Heart of Mindful Living blog and podcast, inspiring others to refresh their minds and nurture their souls. Her trusty sidekick? Fergus, her chocolate Shih Tzu and certified therapy dog, always on cuddle duty. Jen believes true leadership starts with kindness—and, of course, a little glitter!