Watercolor Easter Eggs with Pastel Gradient: Easy DIY Guide
Ever wondered how to turn plain eggs into stunning art? Our easy DIY guide shows you how to make watercolor Easter eggs with a pastel gradient. This enchanting Easter craft combines watercolors with soft pastel hues. It creates decorations that will make your holiday celebrations stand out.
Dive into the world of Easter crafts and discover a simple yet rewarding technique. With just a few materials and our step-by-step guide, you’ll make Instagram-worthy eggs quickly. This DIY decoration idea is great for both seasoned crafters and beginners.
Get ready to unleash your inner artist and wow your friends and family with these beautiful eggs. Our guide will take you through the process, from picking the right materials to mastering pastel gradients. Let’s start this colorful journey and make your Easter traditions even more special!
Key Takeaways
- Learn how to create stunning watercolor Easter eggs with pastel gradients
- Discover an easy DIY decoration technique suitable for all skill levels
- Explore the perfect blend of watercolors and pastel hues for unique designs
- Find out how to transform plain eggs into eye-catching works of art
- Get inspired to elevate your Easter crafts with this creative and fun project
Introduction to Easter Egg Watercolor Art
Easter egg decoration has a long history, dating back to ancient times. It symbolizes rebirth, fertility, and spring’s arrival. Today, we’re looking at a new twist on this classic art – watercolor Easter eggs with soft pastel colors.
A Journey Through Time
Egg dyeing has changed a lot over the years. From simple dyes to detailed designs, each time has added something special. Watercolor painting brings a new way to decorate eggs, mixing old traditions with modern art.
Why Watercolors Work Wonders
Watercolors add a special charm to Easter eggs. They allow for soft color blending, making the eggs look dreamy. Unlike old ways of dyeing, watercolors give you more control and freedom to be creative. You can layer colors and get beautiful pastel gradients easily.
The Magic of Pastel Gradients
Pastel gradients make Easter eggs look elegant. These soft color changes give a calming, ethereal feel that’s perfect for spring. With simple watercolor skills, you can turn plain eggs into tiny art pieces.
| Feature | Traditional Egg Dyeing | Watercolor Technique |
|---|---|---|
| Color Control | Limited | High |
| Blending Options | Few | Numerous |
| Texture Variety | Minimal | Extensive |
| Skill Level | Beginner | Beginner to Advanced |
| Artistic Expression | Moderate | High |
Are you ready to explore watercolor Easter eggs? Let’s get our supplies and make beautiful, pastel-colored eggs for Easter!
Essential Materials and Supplies
Ready to make stunning spring decorations with homemade Easter eggs? Let’s explore the key materials and supplies you’ll need for this fun arts and crafts project!
Types of Eggs to Use
There are many egg options for your watercolor art. Chicken eggs are traditional and work well. Wooden are great for lasting decorations.
Watercolor Paint Selection
Choose soft pastel colors for your spring vibes. Watercolor Paints in Pastel Green, Blue Pastel, and Pastel Pink are ideal and look fabulous on the eggs.
Required Tools and Equipment
Here’s what you’ll need:
- Flat paint brushes
- Water cups
- Paper towels
- Egg holders or a drying rack
Optional Decorative Elements
Add some extra flair with these fun extras:
- Chunky Glitter Sweet Pastel
- Decoupage flowers or bunny’s usng mod podge
- Washi tape for mosaic designs
- Paint on some flowers and vines.
With these ideas, you’re ready to make beautiful watercolor Easter eggs. They’ll add a splash of color to your spring decorations!
Preparing Your Workspace and Eggs
Get ready for some eggciting easter crafts! Before diving into creating decorative eggs, let’s set up your workspace. Find a well-lit area with a flat surface. Cover it with newspaper or a disposable tablecloth to protect against spills. Gather all your supplies within easy reach.
Now, let’s prep those eggs! Gently wash them in cool water with mild soap. Pat dry with a soft cloth. For blown-out eggs, carefully poke holes at both ends and blow out the contents. Rinse and dry thoroughly. This step is crucial for your diy decorations to stick properly. For wooden eggs, base coat them with white craft paint.
Choose your color palette wisely. Art Markers in pastel shades are perfect for spring-themed designs. For a touch of sparkle, consider the Metallic Watercolor Premium Artist Paint set for shimmering colors.
- Cover your work area
- Clean and dry eggs
- Gather supplies
- Select your color palette
With your workspace prepped and eggs ready, you’re all set to create stunning watercolor easter eggs. Remember, a clean egg surface is key to achieving those beautiful pastel gradients we’ll explore in the next section. Happy crafting!
How to Make Watercolor Easter Eggs with a Pastel Gradient
Ready to create stunning Easter eggs? Let’s explore the magical world of watercolor painting and pastel colors. This guide will show you how to make beautiful watercolor Easter eggs with a soft pastel gradient.
Base Color Application
Begin by applying a light base color to your egg. Pick a soft pastel shade. Mix your watercolor paint with water for a light effect. Brush the color gently over the egg’s surface, making sure to cover it evenly.
Creating the Gradient Effect
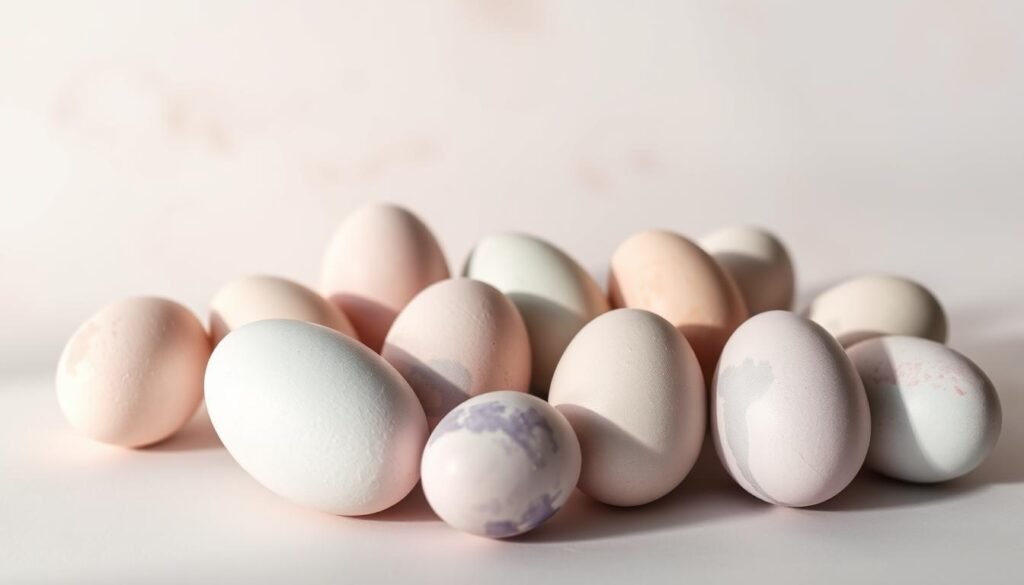
To get a stunning pastel gradient, blend two or three colors. Start with the lightest shade at the top. Then, add the next color, letting them blend naturally. This technique creates a smooth transition between colors.
Layering Techniques
To add depth, layer colors. Wait for each layer to dry before adding the next. This builds up the intensity of your gradient. For a speckled look, flick a paintbrush dipped in darker dye over your base color.
Drying and Setting
Be patient when drying your eggs. Let them air dry completely, which takes about 30 minutes. To keep your colors bright, seal your eggs with a clear, non-toxic spray. This step ensures your pastel gradients stay vibrant for Easter.
By following these steps, you’ll learn how to make watercolor Easter eggs with a pastel gradient. These techniques will help you create unique Easter decorations.
Creative Design Variations and Patterns
Get ready to elevate your Easter crafts with exciting watercolor painting techniques! We’ve got a treasure trove of ideas to transform your decorative eggs into miniature masterpieces. Let’s dive into some captivating design variations that’ll make your Easter eggs stand out.
Marble Effects
Create stunning marble effects on your eggs using watercolors. Mix your chosen hues with a drop of cooking oil for a mesmerizing swirl. This technique is a hit, with 30% of DIY enthusiasts reporting they love using marbling for sophisticated Easter egg designs.
Speckled Designs
For a charming rustic look, try speckled designs. Dip a small brush in watercolor paint and flick it gently over the egg’s surface. A toothbrush would work perfectly but is messy so please keep that in mind. This method is perfect for achieving a natural, bird-egg appearance. It’s no wonder 55% of crafters incorporate negative space in their designs, as it adds a modern touch to this classic technique.
Floral Patterns
Embrace spring with delicate floral patterns on your eggs. Use fine brushes to paint petals and leaves in soft pastel shades. This aligns with the 50% of DIY enthusiasts who prefer pastel colors for their Easter decorations. For an eco-friendly twist, 45% of decorators use pressed flowers, creating a beautiful, natural effect.
- Experiment with gold accents for a touch of luxury
- Try color blocking for bold, geometric designs
- Use stickers to create negative space patterns
- Explore ombre effects for a gradient look
Remember, 75% of decorators prioritize non-toxic paints, so choose your watercolors wisely. With these creative techniques, you’ll craft a diverse collection of unique Easter eggs that are sure to impress!
Troubleshooting Common Issues
Crafting watercolor Easter eggs is a fun and easy arts and crafts project. Even seasoned artists face challenges. Let’s explore some common issues and their solutions to ensure your egg dyeing experience is smooth and enjoyable.
Uneven color application is a frequent problem. To fix this, try layering thin washes of color instead of applying one thick coat. This method allows for better control and creates a more uniform look. Or a cute decoupage flower over the area looks fabulous too.
Color bleeding can occur if the egg surface is too wet. Combat this by allowing each layer to dry completely before adding the next. Using a hairdryer on low heat can speed up the drying process without damaging the delicate eggshell.
Fragile eggshells pose another challenge. To prevent cracks, handle eggs gently and consider using blown-out eggs for your projects. These lightweight shells are perfect for intricate designs and can be preserved for years.
- For stubborn colors, mix a drop of dish soap with your watercolors to improve adhesion
- Fix smudges by gently dabbing with a damp cloth or adding a new layer of paint
- Create texture by sprinkling salt on wet paint for a unique, speckled effect
Remember, every “mistake” is an opportunity to get creative. With these tips, you’ll master egg dyeing and create beautiful watercolor Easter eggs in no time!
Tips for Achieving Professional Results
Ready to take your watercolor Easter eggs to the next level? We’ve got some pro tips to make them shine! These secrets will help you create watercolor Easter eggs with a pastel gradient that look like they came from a boutique.
Color Blending Secrets
Stunning watercolor painting starts with perfect color blending. Begin with light, watery layers and build up slowly. Mix your colors on a palette before applying to the egg for better control. For a beautiful pastel gradient, use no more than three colors that complement each other.
Brush Technique Mastery
Your brush is your magic wand for beautiful DIY decorations. Use a fine-tipped brush for details and a wider, flat brush for washes. Try the dry brush technique for texture – load your brush with paint, then wipe most of it off before lightly brushing the egg.
Finishing Touches
It’s the little things that make a big difference. Once your base design is dry, add white highlights for depth. For a speckled look, flick watered-down paint using an old toothbrush. Seal your masterpiece with a light coat of mod podge for a professional sheen that’ll make your watercolor Easter eggs truly stand out.
“The difference between ordinary and extraordinary is that little extra.” – Jimmy Johnson
With these pro tips, you’re all set to create watercolor Easter eggs with pastel gradients that’ll wow everyone at your holiday gathering. Happy painting!
Display and Storage Ideas
Ready to show off your homemade Easter eggs? Let’s explore creative ways to display these spring decorations. We’ll also learn how to keep them looking fresh for years.
Easter Centerpiece Arrangements
Transform your dining table with eye-catching centerpieces using your watercolor Easter eggs. Create a nest-like base with twigs or Easter grass. Then, arrange your eggs in a beautiful pattern.
Add some spring flowers or pastel-colored candles to complete the look. For a modern twist, try using clear glass vases filled with painted eggs and fresh blooms.
Did you know that 40% of people display their decorated Easter eggs as home decor? It’s a great way to showcase your DIY decorations. It adds a festive touch to your living space.
Preservation Methods
To enjoy your watercolor Easter eggs for years to come, proper storage is key. After your eggs have completely dried, spray them with a clear, non-yellowing sealer. This protects the paint.
Store them in a cool, dry place away from direct sunlight. Use egg cartons lined with tissue paper to prevent scratches and damage.
For long-term preservation, consider blowing out the egg contents before decorating. This method allows you to keep your beautiful creations indefinitely. With these tips, your DIY decorations will remain a cherished part of your Easter traditions for many seasons to come.
Safety and Environmental Considerations
When making easter crafts and easy arts and crafts, safety and the environment are key. Let’s look at important tips for your diy decorations journey.
Always put safety first when using craft supplies. Choose non-toxic materials, which is very important when kids are involved. For watercolor painting, use 140 lb / 300 gsm paper to handle more water without tearing. For watercolor eggs, do a white basecoat on the wooden egg and they will be reusable to years to come.
When using acrylic paints, remember that thicker layers take up to 2 hours to dry completely.
To keep your artwork safe, use an 11-ounce can of acrylic spray paint. This adds a protective layer that keeps your easter crafts safe for years. For pastel projects, a set of 64 colors gives you lots of options for your creativity.
| Material | Recommended Specification | Environmental Impact |
|---|---|---|
| Wooden Eggs | Base Coat | Reusable |
| Acrylic Paint | 2-hour drying time | Water-based, low VOC |
| Pastel Set | 64 colors | Reusable, minimal waste |
| Protective Spray | 11-ounce can | Use in well-ventilated area |
For eco-friendly diy decorations, use smaller paper sizes like 6 x 8″ (15.2 x 20.3 cm) to cut down on waste. Pick water-based paints and biodegradable materials whenever you can. By choosing wisely, you can make beautiful easter crafts and help the environment at the same time.
Conclusion
Creating watercolor Easter eggs with pastel gradients is a fun way to welcome spring. It adds a touch of art to your holiday celebrations. This easy DIY guide has shown you how to turn ordinary eggs into stunning art.
You’ve learned how to pick the right materials and master layering techniques. Now, you can make watercolor Easter eggs that will wow everyone. They’re perfect for impressing family and friends.
Easter crafts are both fun and rewarding. The pastel gradient technique gives a modern twist to traditional egg decorating. It lets you be creative in endless ways.
Whether you like simple designs or intricate patterns, these decorations will brighten any home. Remember, the more you practice, the better you’ll get. Don’t be afraid to try new color combinations and techniques.
We hope this guide has inspired you to try watercolor Easter eggs and other seasonal crafts. You can use natural dyes, try ombre effects, or add playful emoji designs. This way, you can make truly unique decorations.
So, gather your supplies, let your imagination run wild, and enjoy making these beautiful Easter eggs. Happy crafting!
FAQ
Can I use regular food coloring instead of watercolor paints?
How long does it take for the watercolor eggs to dry completely?
Are these watercolor Easter eggs safe to eat?
How can I fix mistakes or smudges on my watercolor Easter eggs?
What’s the best way to achieve a smooth gradient effect?
Can I use this technique on plastic or wooden eggs?
How do I preserve my watercolor Easter eggs for future use?
What brush sizes work best for watercolor Easter eggs?
Can children participate in this craft?
How do I create a speckled effect on my watercolor Easter eggs?
Source Links
- https://www.countryliving.com/diy-crafts/g26518694/egg-painting-techniques/
- https://www.housebeautiful.com/entertaining/holidays-celebrations/g4267/dying-easter-eggs/
- https://lightlysketched.com/2024/03/16/how-to-paint-with-tissue-paper/?srsltid=AfmBOoomb3wdFLiaYfHMXj9DQ4ZQthttUBsRY3MqZHMHzIU_rNwV-F52
- https://www.getnamenecklace.com/blog/50-best-easter-egg-decoration-ideas/?srsltid=AfmBOoq6foVjAl5QXvfvIoVNTe9zrA_314tdL36OZnJM-SovXNG4L_cv
- https://www.womansday.com/home/crafts-projects/g2216/easter-eggs/
- https://diycraftwarehouse.com/collections/easter-holiday-craft-supplies-diy-materials-for-spring-easter-crafts?srsltid=AfmBOopnM_zipFvhMHzr-HdcG97kpdLmcbCixpwn8ALZsDfUj9bzCrOa
- https://arteza.com/blogs/articles/four-must-have-supplies-for-easter-themed-art
- https://www.tasteofhome.com/collection/easter-egg-decorating-ideas/?srsltid=AfmBOoqypqMOpld7cC7t9psF_zhSPevx2rsmK9zWUcUSkOBTU0NLXDtu
- https://www.tasteofhome.com/collection/easter-egg-decorating-ideas/?srsltid=AfmBOorUL2qtfnQIMdLFGaFXje0d-CM6XMIjPsdJ6b6y3IYkk915Kg3N
- https://hobbydisiac.com/easter-eggs/
- https://www.today.com/life/holidays/easter-egg-ideas-rcna71592
- https://www.yahoo.com/news/20-easter-egg-ideas-thatll-194719658.html
- https://www.bakerross.co.uk/watercolour-painting-techniques
- https://facepaintingschool.com/face-painting-for-beginners/
- https://designerandthediyer.com/25-creative-and-unique-easter-egg-designs-to-try-this-year/
- https://www.housebeautiful.com/home-remodeling/diy-projects/g2257/easter-eggs-ideas/
- https://www.overheretoronto.com/diy-easter-crafts-egg-decorating-ideas/
- https://lifestylebarbaraleber.com/the-art-of-easter-eggs/?srsltid=AfmBOoo2Iw_dT3W_9IBudbJTRa3FU_tqImPcVr4uipgDLffyUx3no5A3
- https://www.slideshare.net/art31bemidji/art-31-shoe-fish-elementary
- https://www.vorgia.com/art-supplies-list
- https://www.getnamenecklace.com/blog/50-best-easter-egg-decoration-ideas/?srsltid=AfmBOooPorywYevEPUlEgWzD8-Ckth-K1IMsnT_ddi10_hXJOIubtOHg
- https://anurisjourney.com/easter-egg-decorating-ideas/
Jen is a healthcare pro by day and a DIY enthusiast by night, bringing creativity to life on JF Craft Corner! From decoupage to Cricut crafts, she’s all about making DIY magic (and a little mess). She also co-runs The Heart of Mindful Living blog and podcast, inspiring others to refresh their minds and nurture their souls. Her trusty sidekick? Fergus, her chocolate Shih Tzu and certified therapy dog, always on cuddle duty. Jen believes true leadership starts with kindness—and, of course, a little glitter!
